
Design
Shapes
SummaryDrop an oval, polygon, or star on the hoop, then change outline, fill, and thread.
Shape places a prepared piece in the hoop: Oval, Polygon, Star, Line, and Curve. Oval, polygon, and star are Outline objects. The path is the border, so they can have an inside. Line and Curve are Centerline; see Centerline and outline.
The pictures here use a hexagon (Polygon with 6 sides). Star and Oval use the same stitch settings.
Find Shape
Shape sits in the middle of the top bar, between Draw and Text.
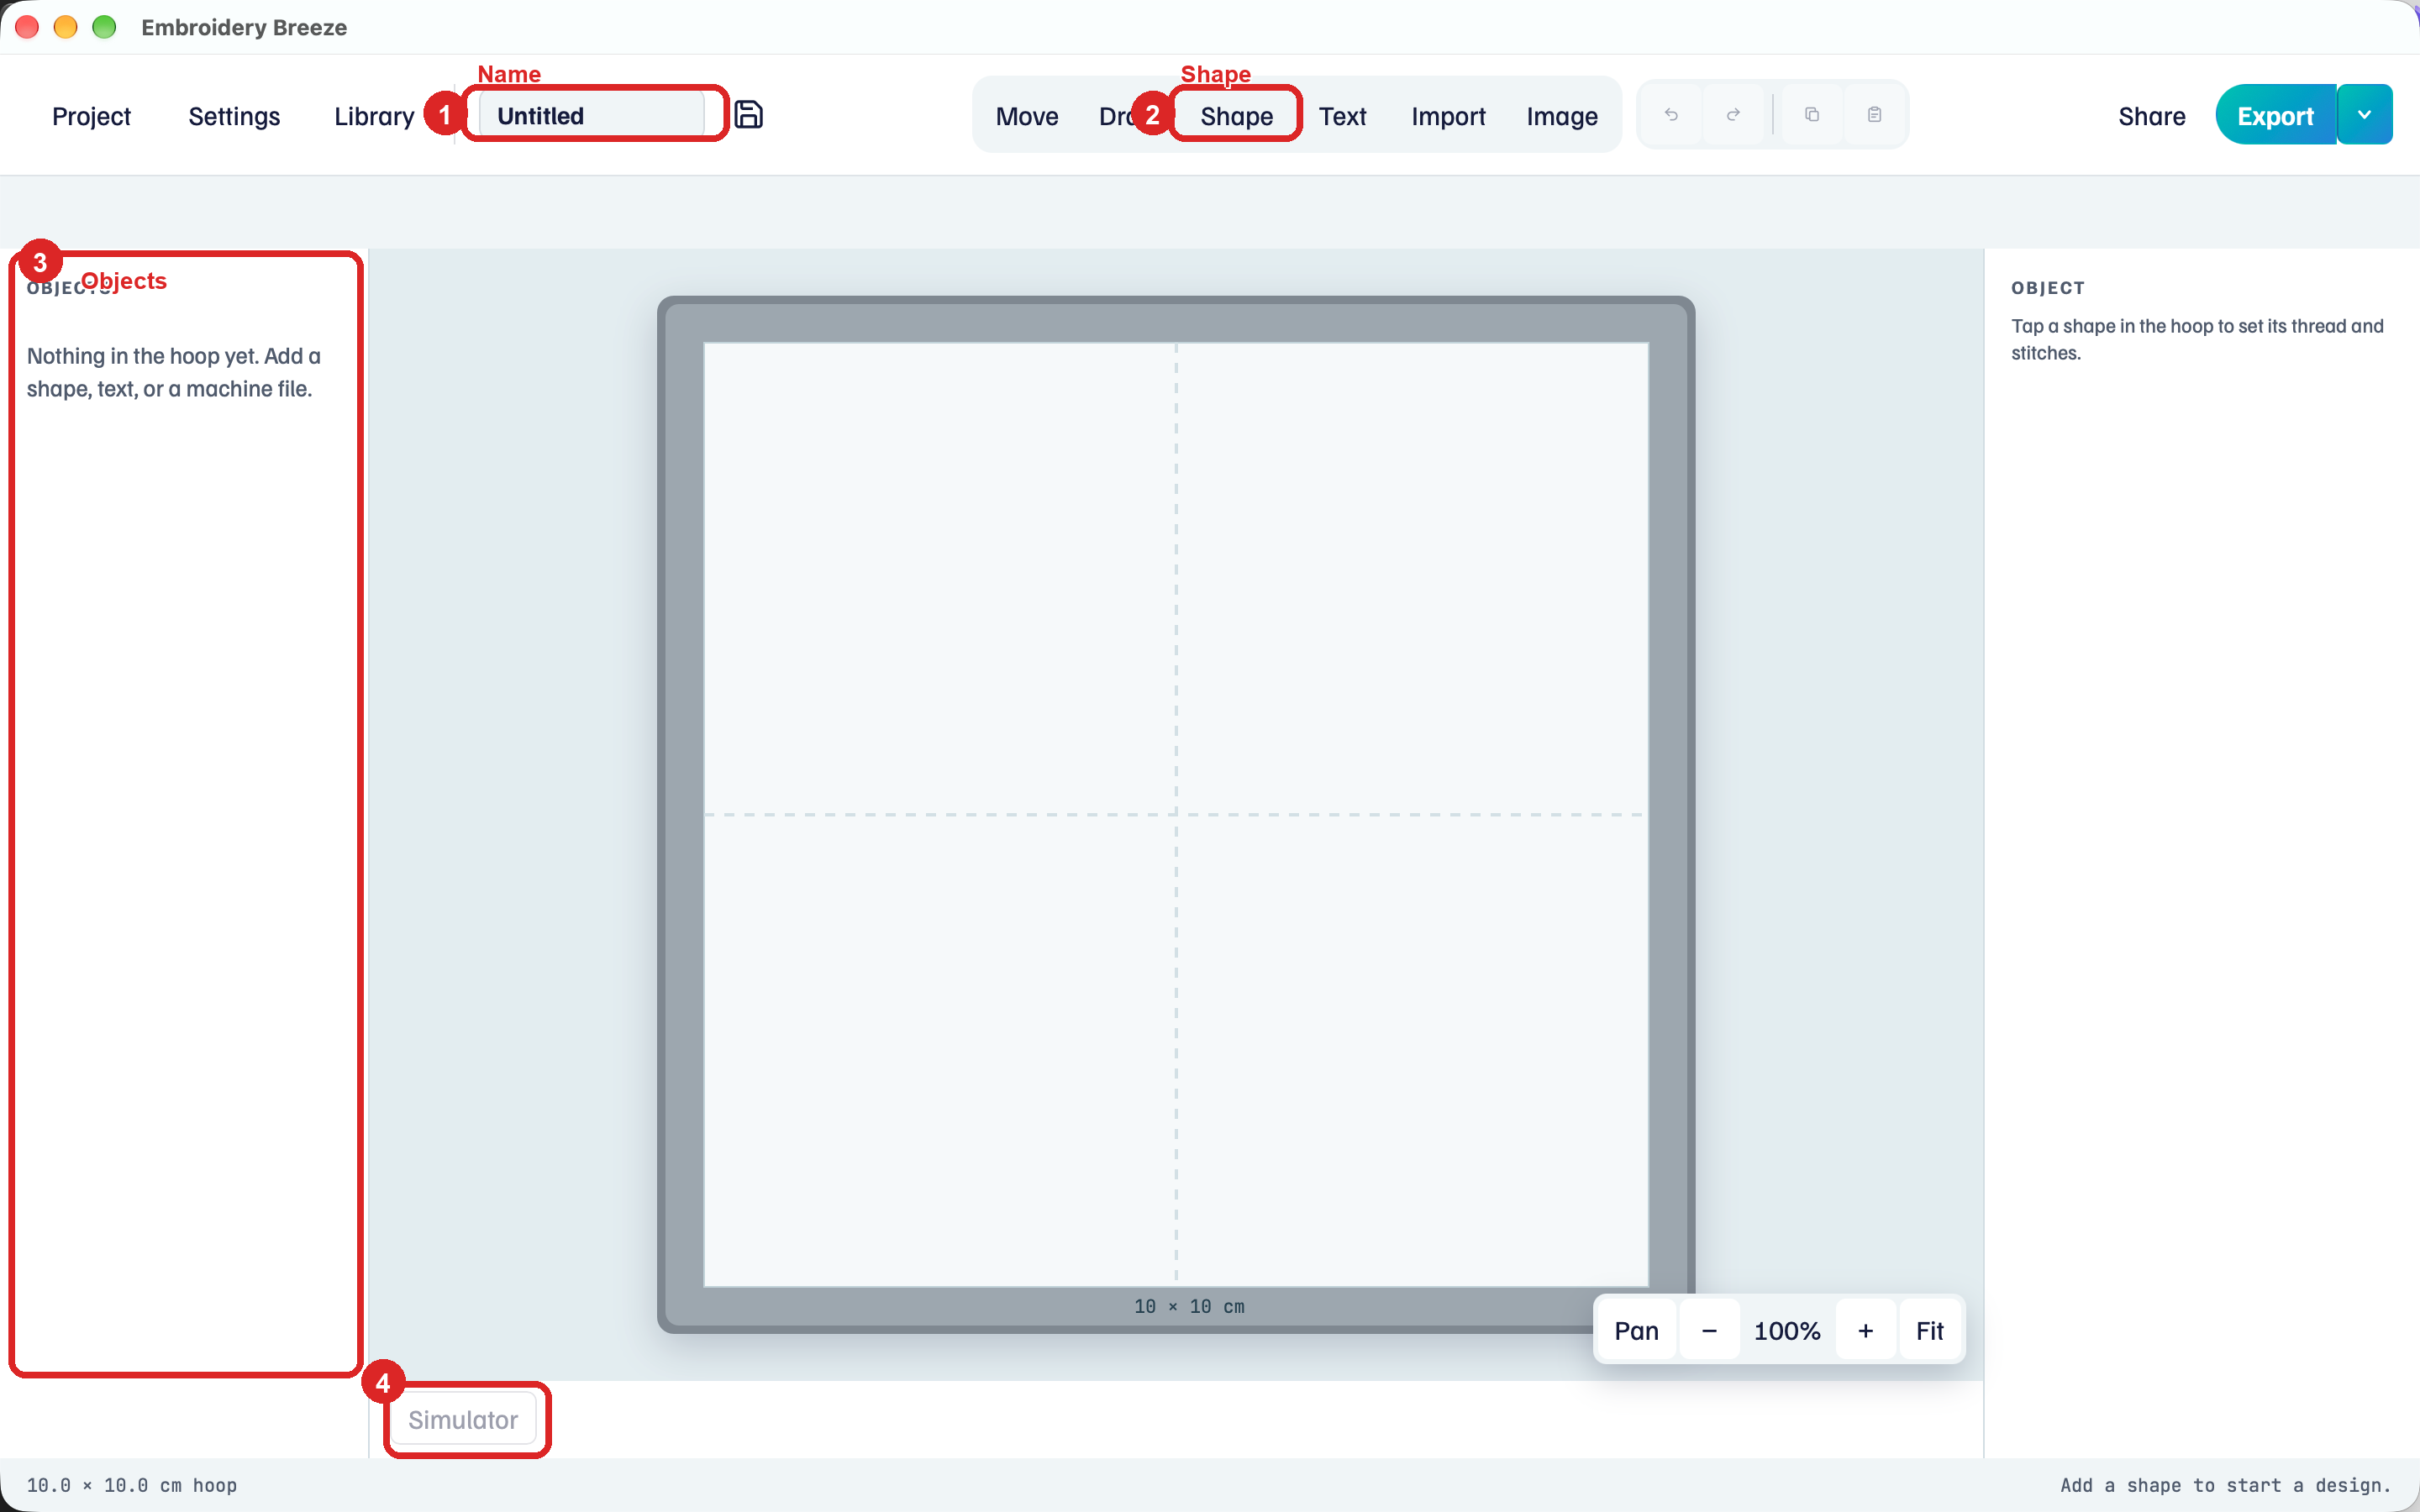
- Click Shape. A second row appears: Oval, Polygon, Star, Line, Curve.
- Click Polygon (or Star, or Oval). The piece lands in the hoop, selected.
Polygon starts with 5 sides. Star starts with 5 points. Use Sides or Points in properties to change that. A hexagon is 6 sides.
Pose it
With Move (the default after placing):
- Drag the piece to move it.
- Drag a corner handle to resize. Rotate from the rotation handle above the box.
- Flip horizontal and Flip vertical on the tool row under the top bar.
- Free resize lets the box change aspect. Click it to use Proportions locked.
- Snap lines up with nearby objects, the hoop, and the grid. Snap off drags freely.
A star or polygon can shrink to about 0.4 mm. Lines stay longer so they still sew.
Border satin
A new shape starts with Border on as Fine line, and Fill off. That is a light running stitch around the edge. Satin makes a padded column on that same edge.
- Border on the right. Fine line, Bean, and Satin are the everyday stitches. Satin is selected in this picture.
- Satin width is how wide the edge column is. Drag it while you watch the hoop.
The hint says satin is a column on the edge, and that Fill covers the inside. Leave Fill off for a hollow badge. Turn it on when you want the middle stitched.
Bean is a triple stitch along the same path. It has a pass count (3, 5, or 7). Fine line and Bean use Stitch size instead of width.
Fill the inside
Fill is below Border in the same column.
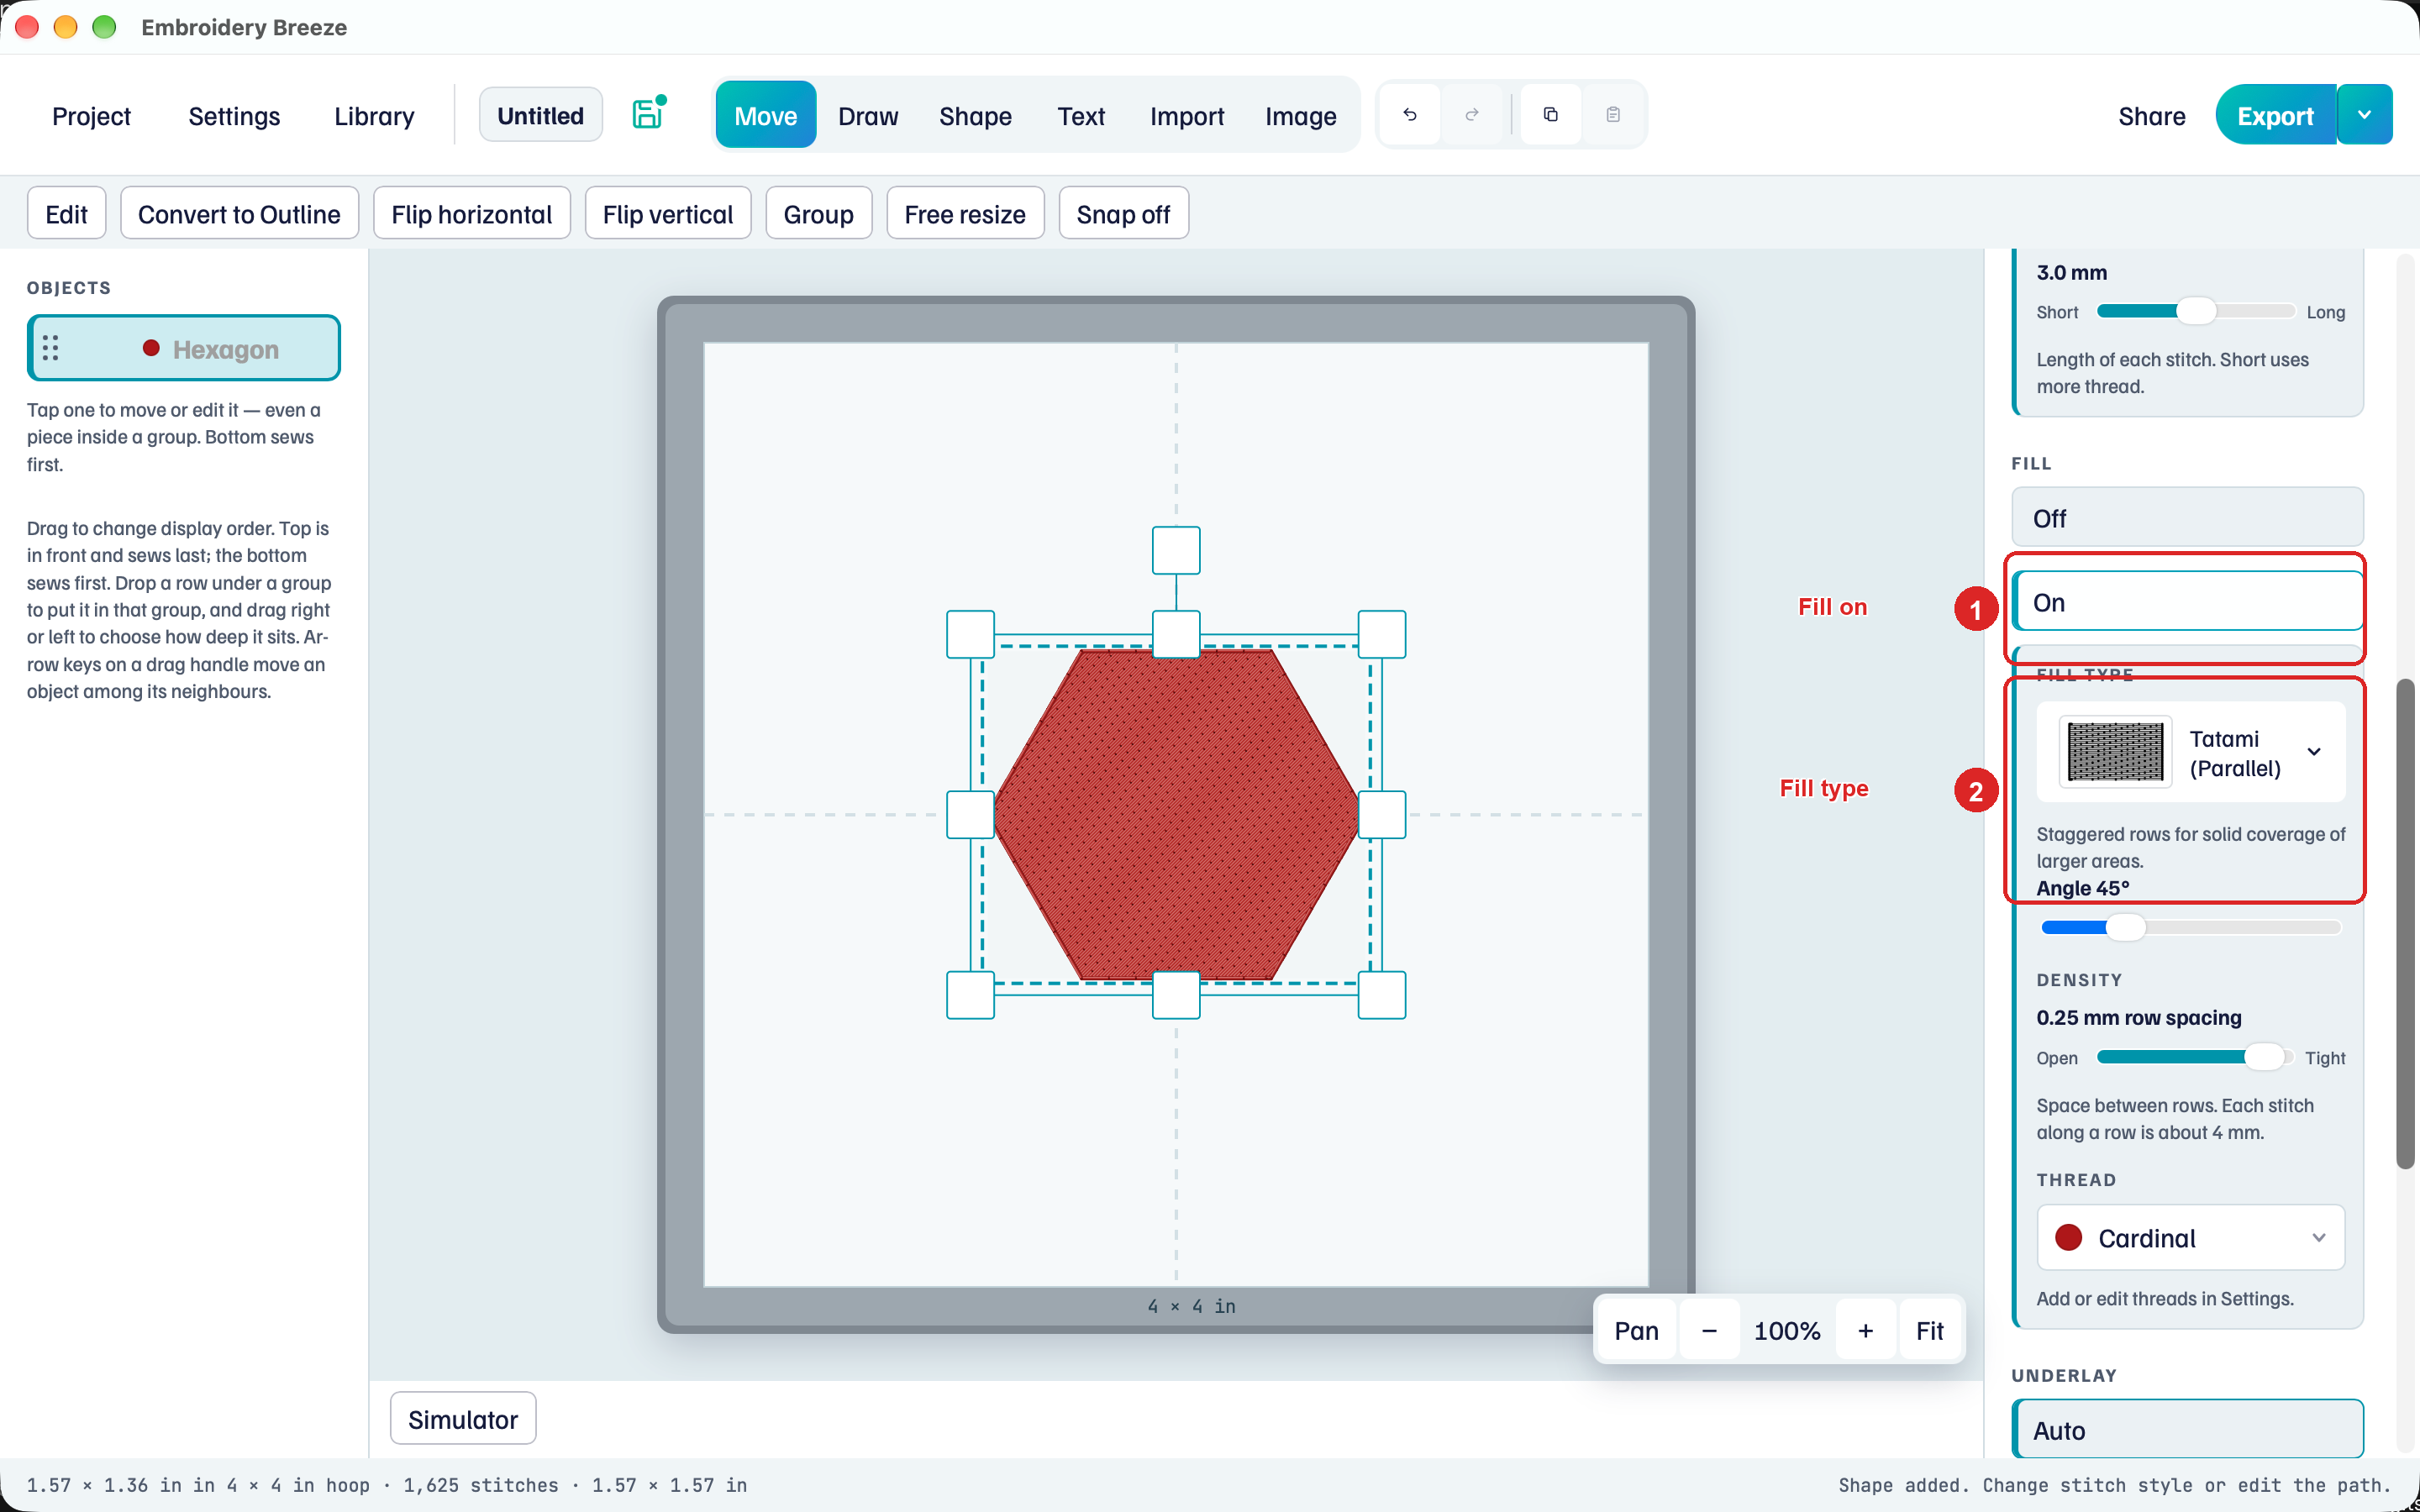
- Under Fill, click On.
- Open Fill type. Tatami (Parallel) is the usual solid fill. There are decorative styles too.
- Drag Density toward Tight for closer rows, or Open for more space.
Tatami hint: space between rows. Each stitch along a row is about 4 mm. Tighter uses more thread, and can feel stiffer on a knit.
Fill needs a closed shape. Line and Curve cannot fill until you close them or convert to outline.
Two thread colors
Fill and border can each have their own thread. That is how a gold star gets a red edge.
- Under Fill, pick a fill thread.
- Under Border, pick a different border thread.
Add threads in Settings if the color you want is not in the list.
Points, sides, and the other tools
With a Star selected, properties show Points and Point depth.
- Click + or − on Points (3 to 12).
- Drag Point depth toward Deep for sharper points, or Shallow for a fuller star.
Polygon has Sides instead of Points. 3 is a triangle, 4 a square, 6 a hexagon.
- Oval: ellipse. Same outline and fill as the hexagon.
- Line and Curve: centerline strokes. Border Satin follows the path. Use Convert to Outline when that stroke should become a filled ribbon.
- Edit on the tool row turns a parametric shape into nodes you can drag. Done leaves Edit.
Draw is the free path tool, for anything that is not a regular oval or star.
Play Simulator after you change stitches. Save a .breeze file before you export.
The full stitch menus are in Stitches and fills.