
Start
Getting started
SummaryAdd a shape to the hoop, save a .breeze file, and export a file for your machine.
The hoop
When you open the app, you see an empty hoop. The hoop is the page for your design. Everything you add sits on it.
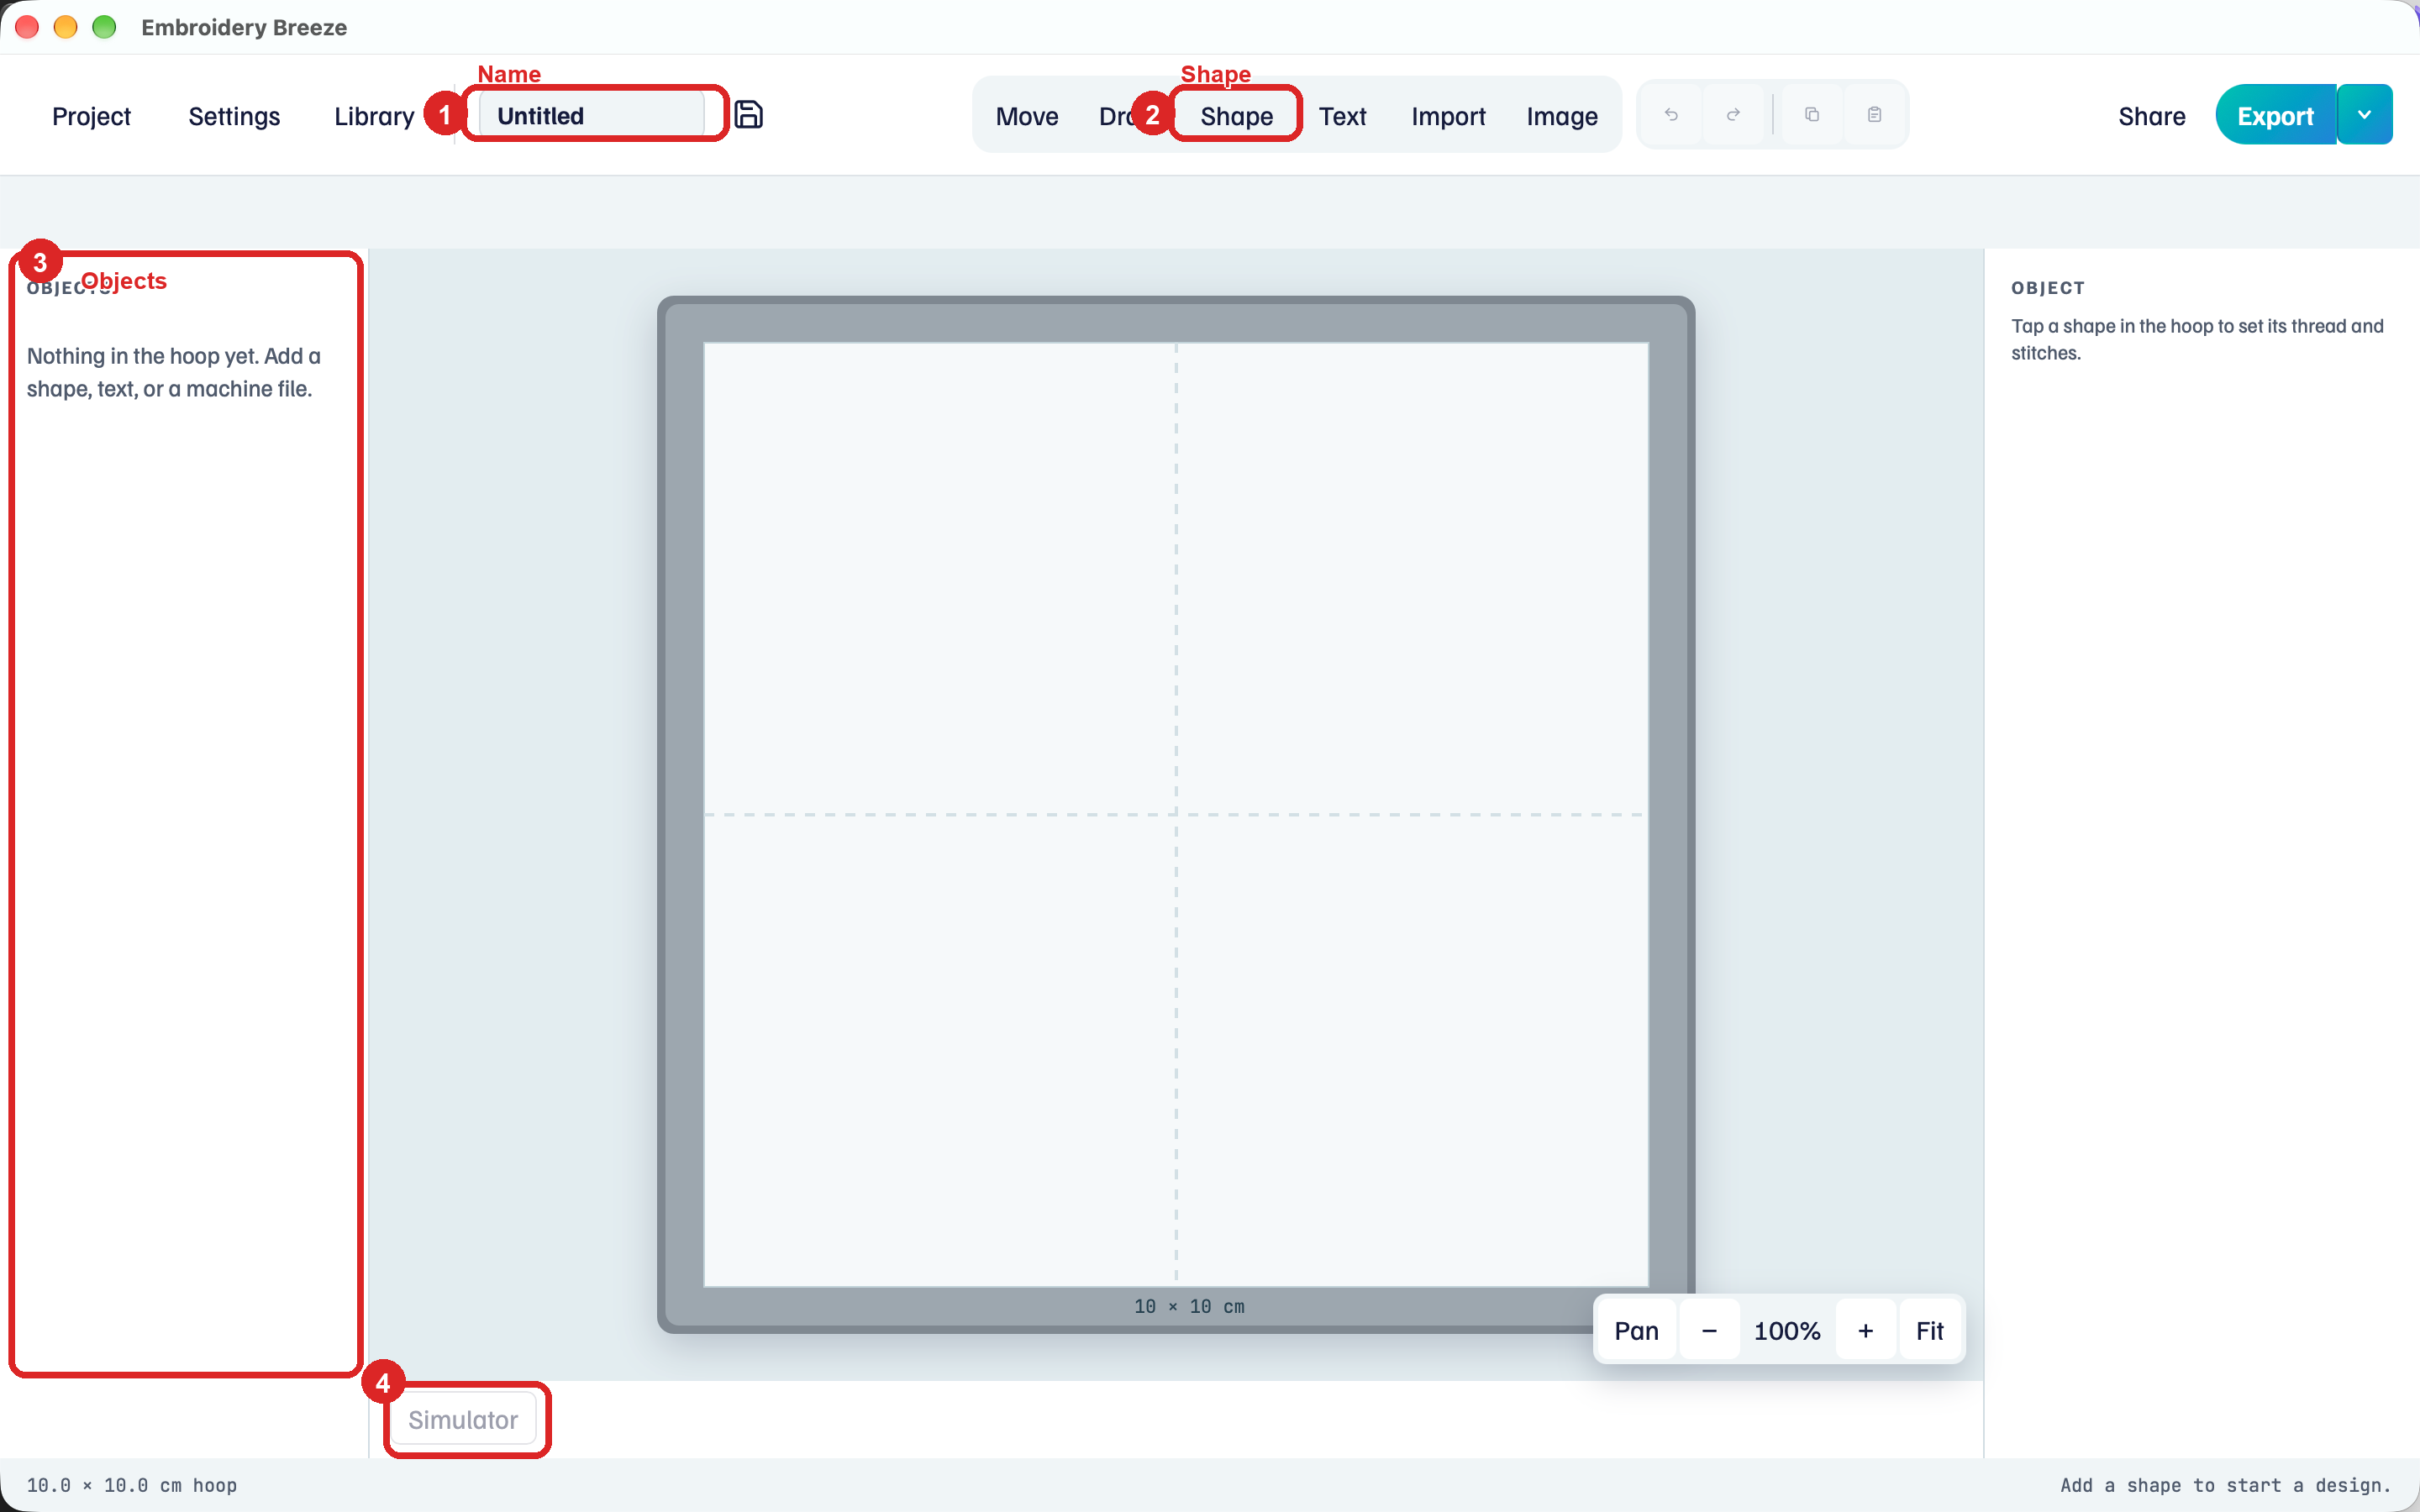
- Name. Starts as Untitled. Rename it when you save.
- Shape. Places a ready-made piece on the hoop.
- Objects. Lists everything on this hoop. Empty until you add something.
- Simulator. Plays the stitch path. Unavailable until the hoop has stitches.
The hoop in this picture is 10 cm x 10 cm, the same size as the 4 in x 4 in preset. Choose Settings to change hoop size, units, and fabric.
Until you select a piece, the right panel says Tap a shape in the hoop to set its thread and stitches.
To start a new design, choose Project → New. If the current design has unsaved changes, choose Save, Don't save, or Cancel.
The window
After you add a shape, Objects lists it and the right panel shows its stitches. The picture below uses a hexagon so those areas have something in them.
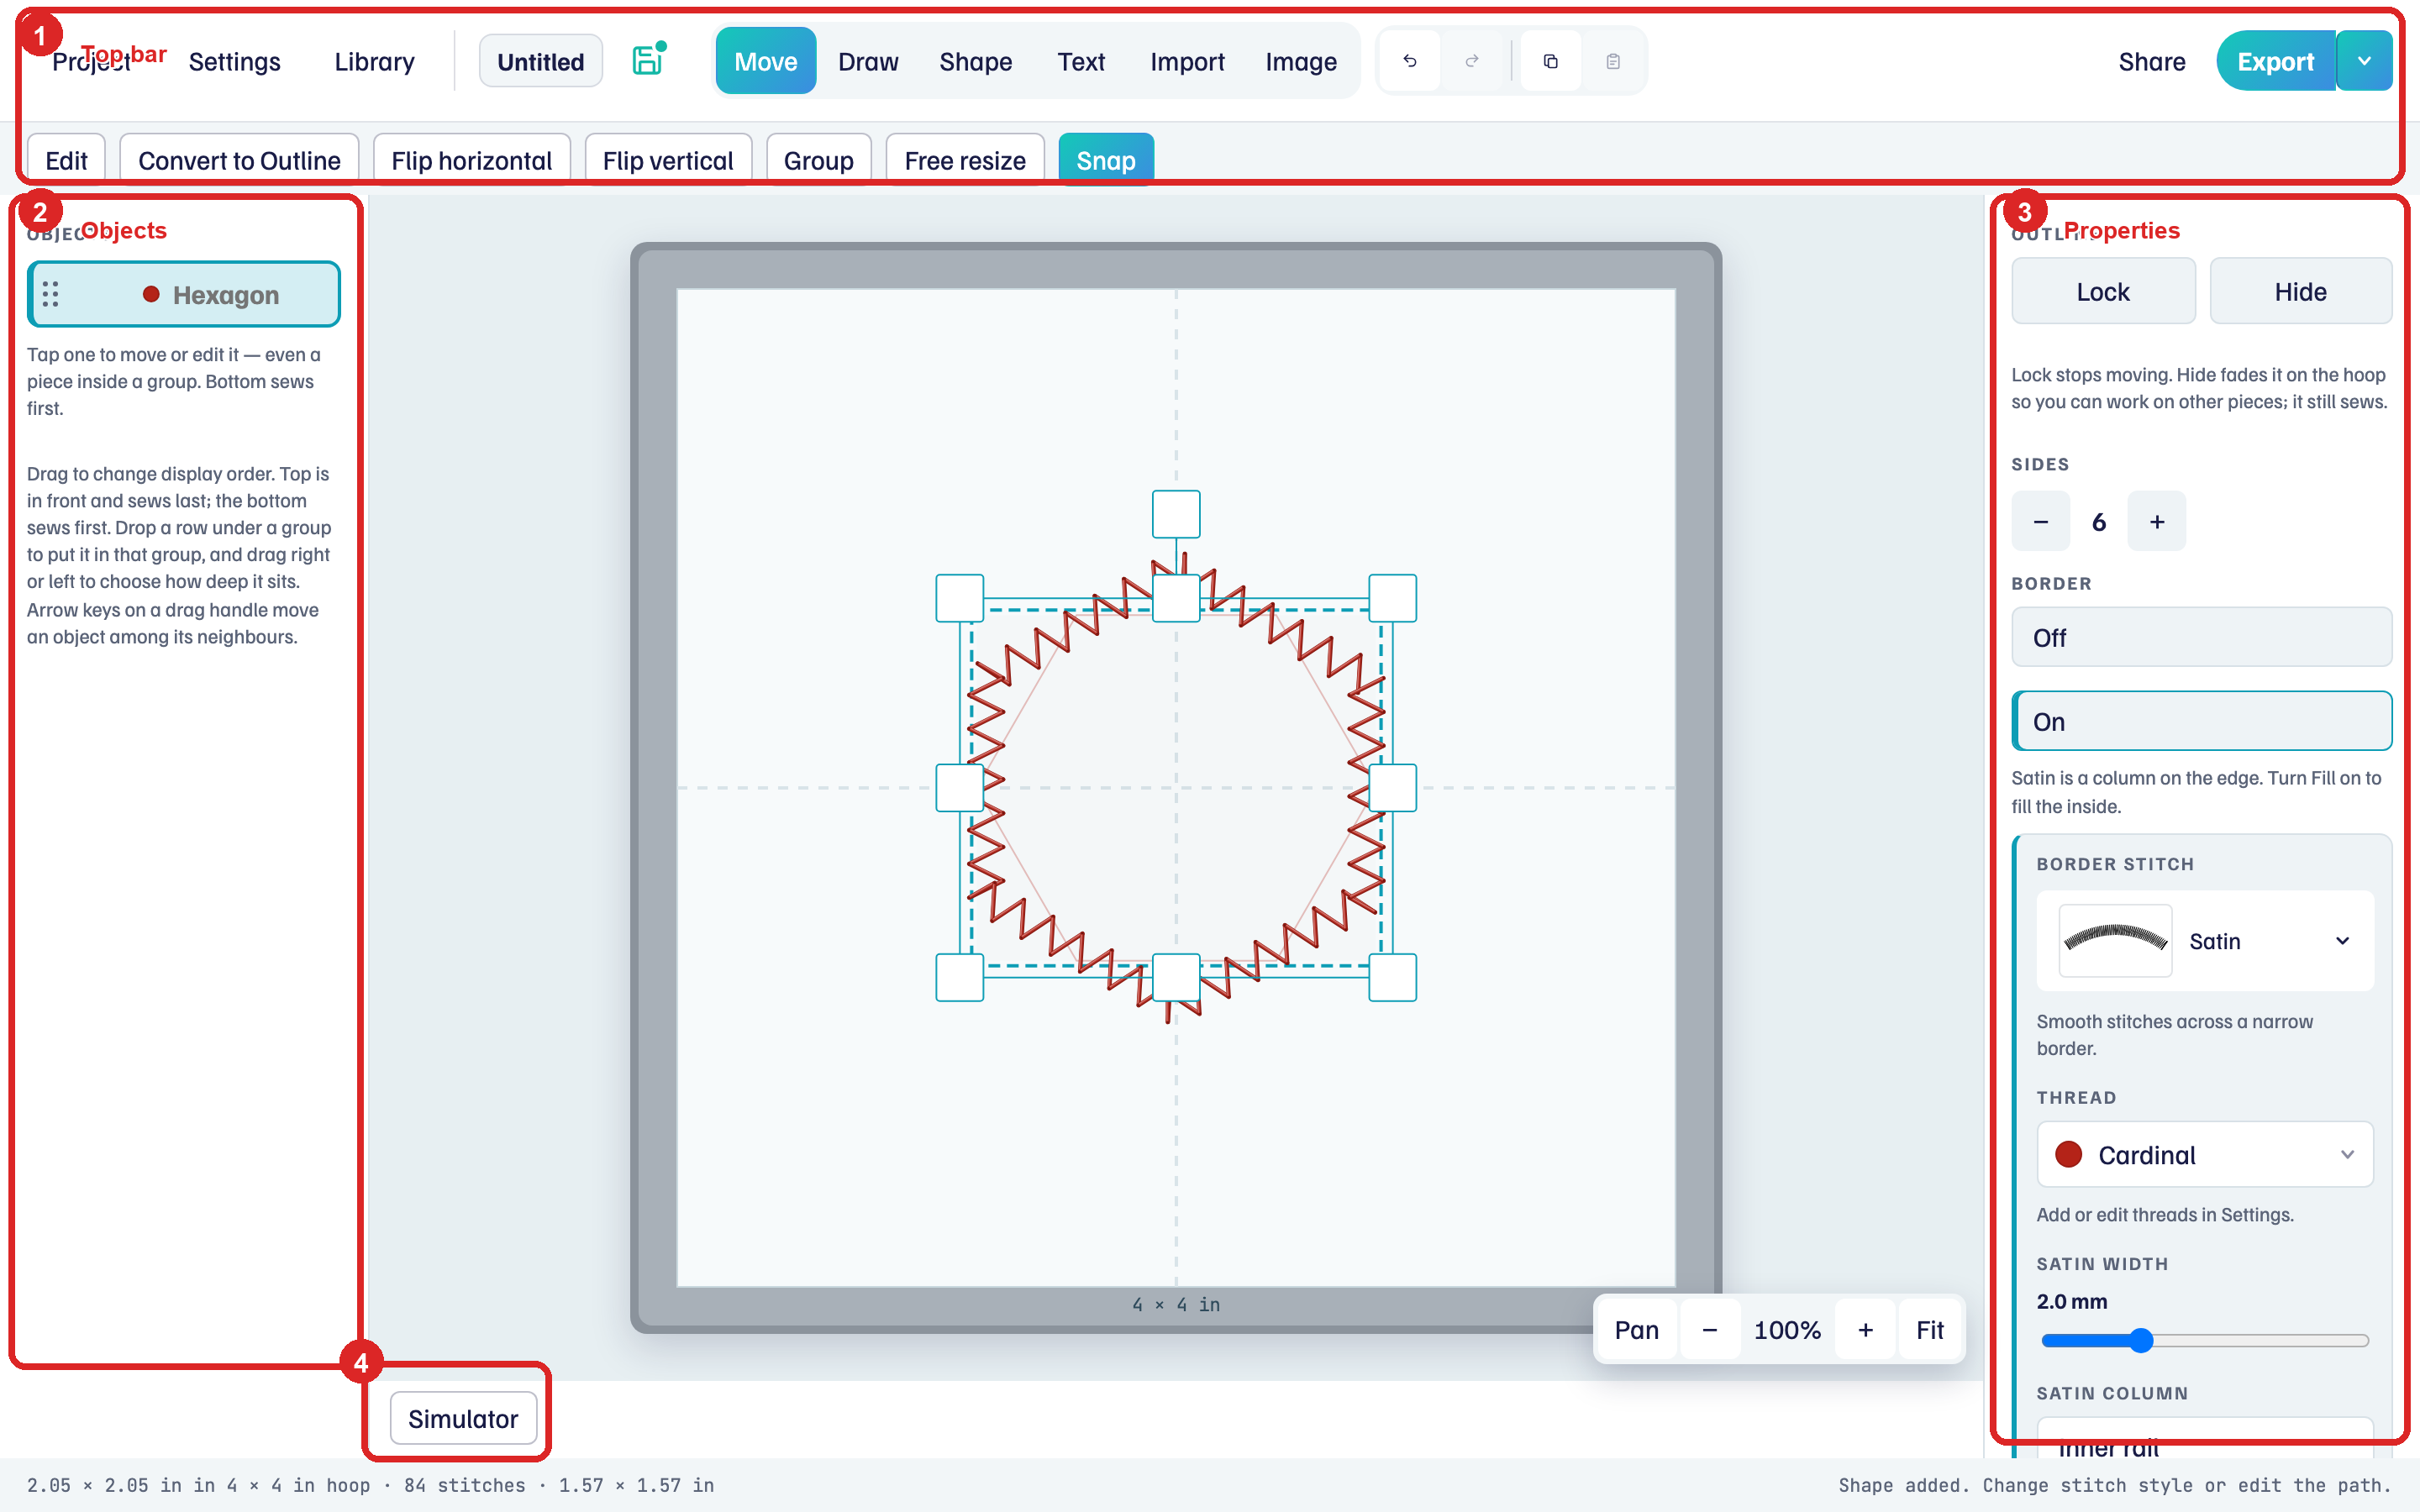
- Top bar. Project, Settings, and Library on the left. Tools in the middle: Move, Draw, Shape, Text, Import, Image. Share and Export on the right. When a piece is selected, a second row appears (Edit, Flip horizontal, and so on).
- Objects. Every piece on the hoop. The bottom of the list sews first. The top sits in front and sews last.
- Properties. Thread, outline, and fill for the selected piece.
- Simulator. Plays the stitch path.
Pan, −, +, and Fit (bottom right of the hoop) zoom the view. They do not change the design.
Add a shape
Shape is marked 2 in the first picture.
- Click Shape. The row under the top bar shows Oval, Polygon, Star, Line, and Curve.
- Click Oval, Polygon, or Star. The piece appears on the hoop, selected.
Objects lists the piece. The right panel shows its stitches. A new shape uses Fine line for the border and Fill off.
The right panel also says Outline or Centerline. That is covered in Centerline and outline.
Preview stitches
Simulator is marked 4, under the hoop.
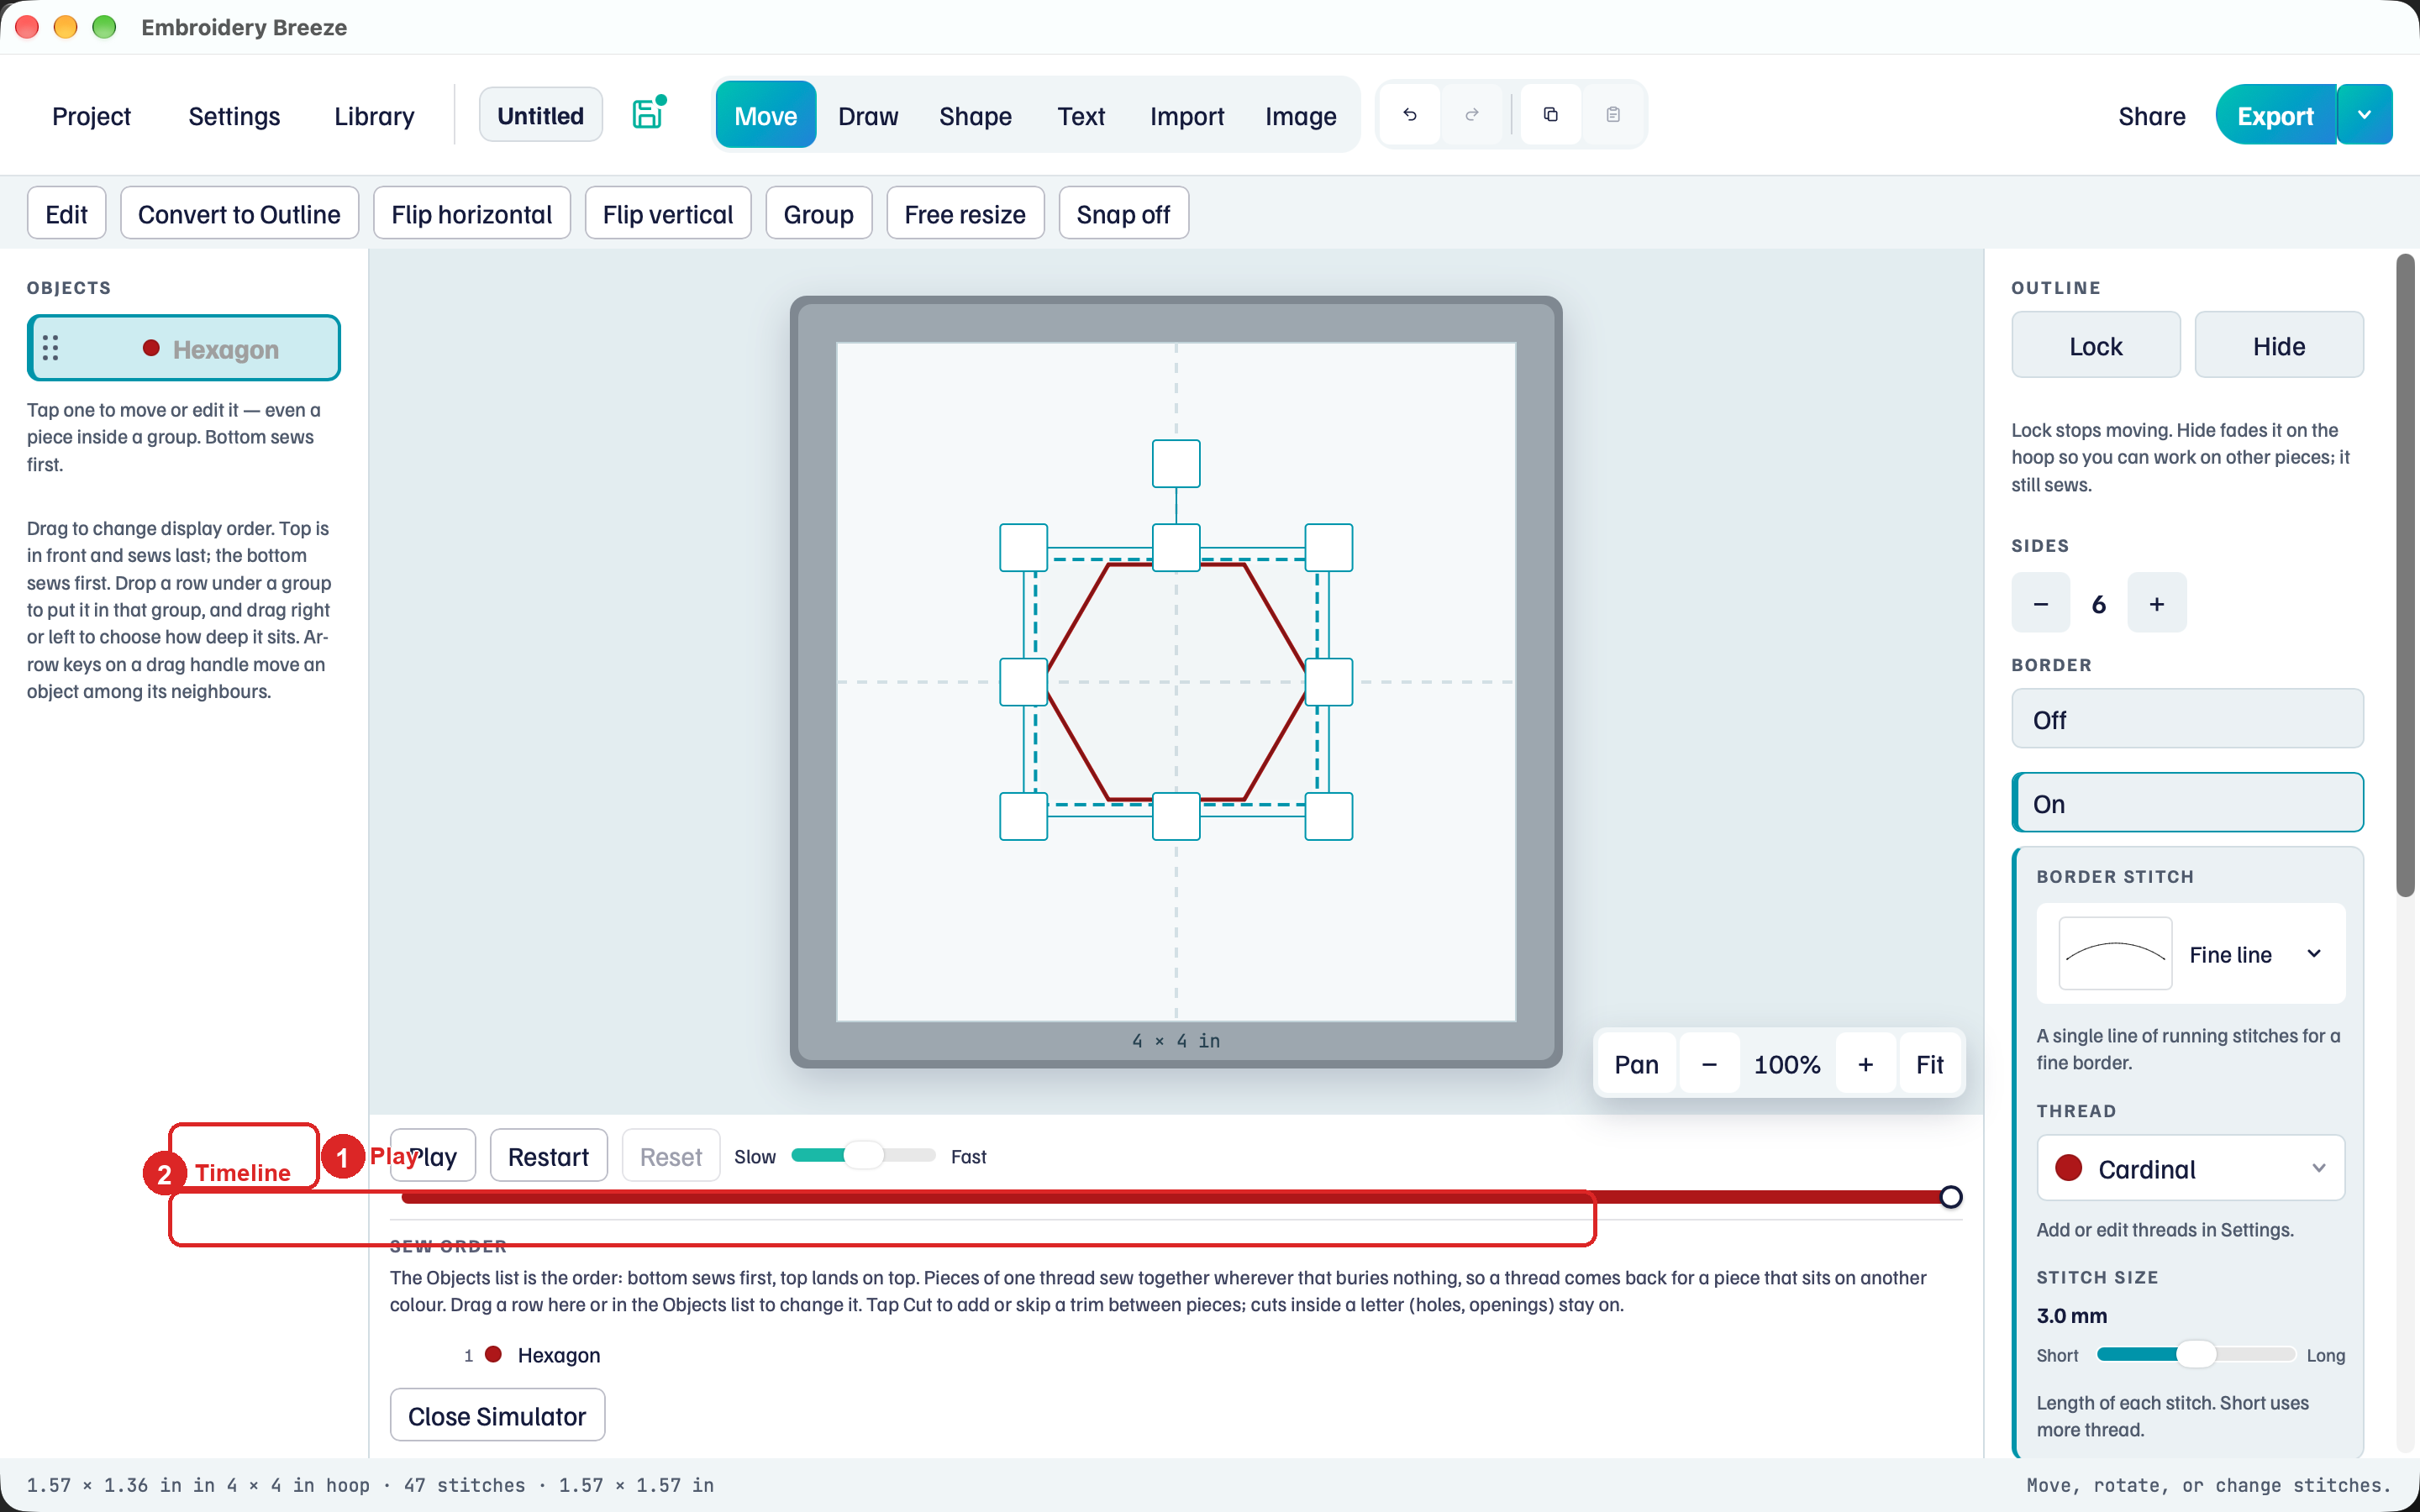
- Click Simulator.
- Click Play. Stitches appear in the order the machine will sew them.
- Click Close Simulator.
If Simulator is unavailable, add a shape first.
Save the design
A .breeze file is the design you reopen and keep editing. Export (next) writes a separate file for the machine.
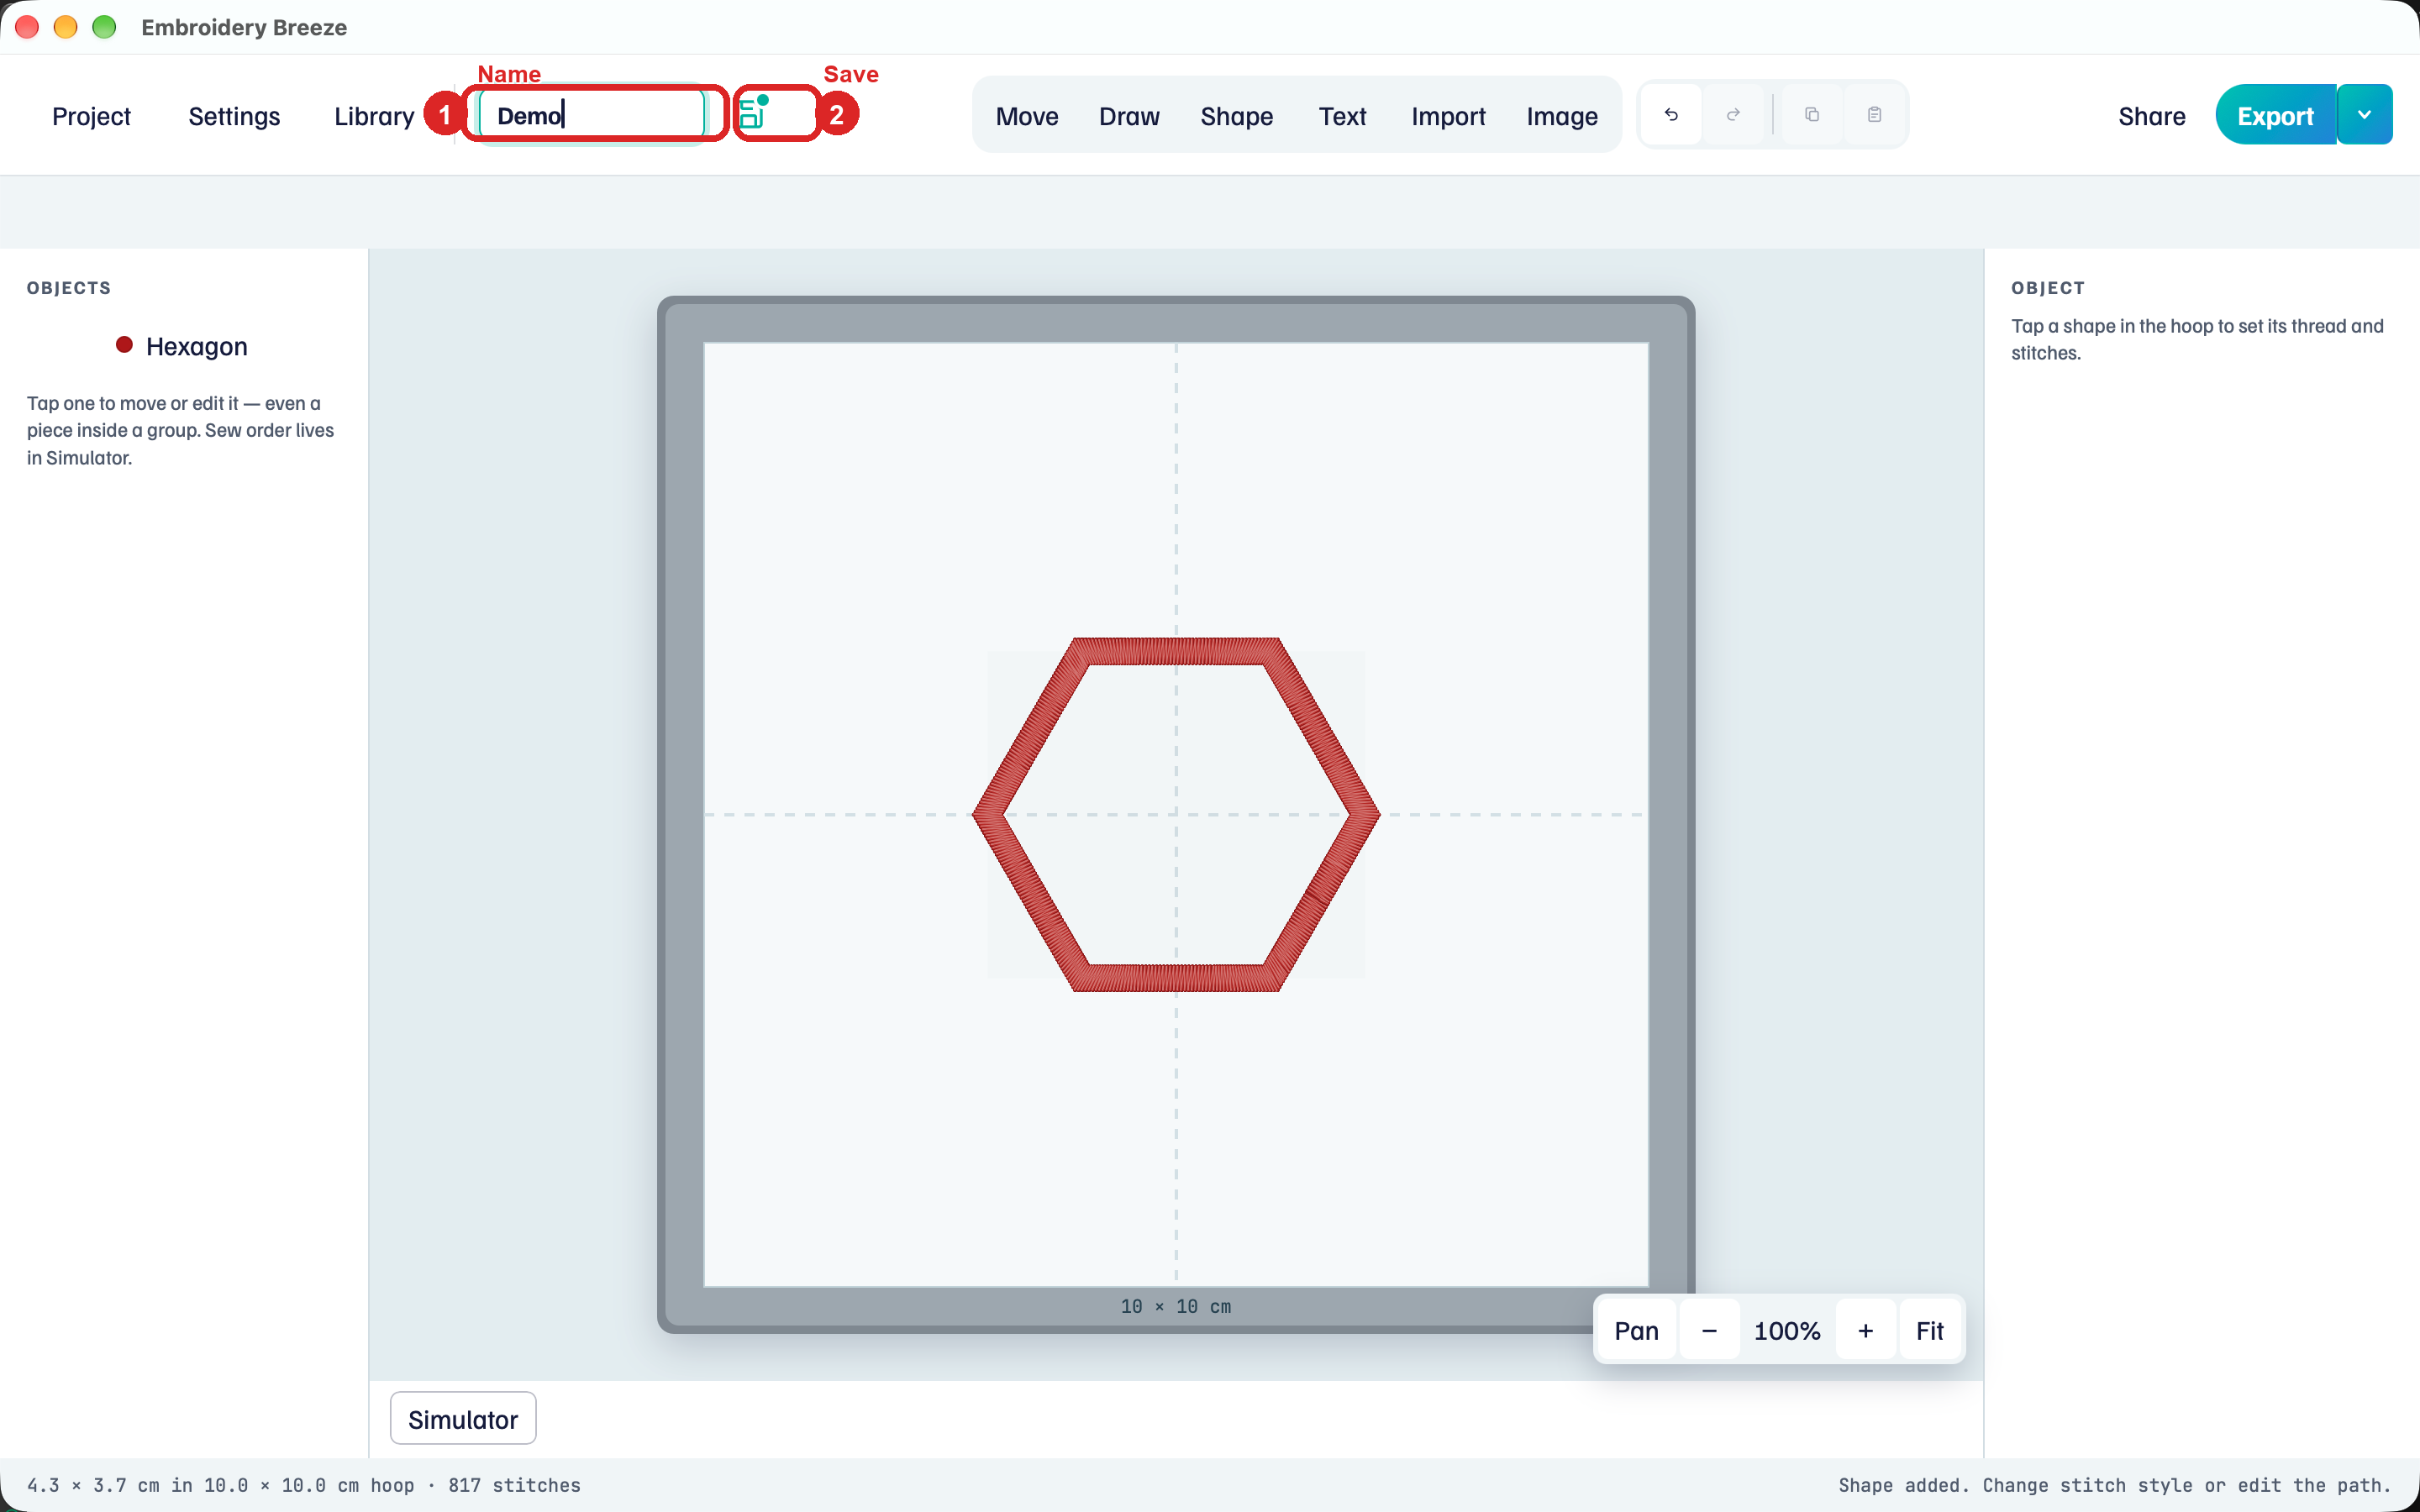
- Click the name field (1) and type a name, such as
Demo. - Click the disk next to the name (2), or choose Project → Save.
- Choose a folder. Embroidery Breeze writes a
.breezefile.
The disk is teal when the current version is saved. Save Copy writes a second .breeze file and keeps this one open. Save the design once before you use Save Copy.
Save and export need a license after the trial. Choose Settings to see the license on this device.
Export a machine file
Export writes a file your machine can sew. The original .breeze file stays the one you edit.
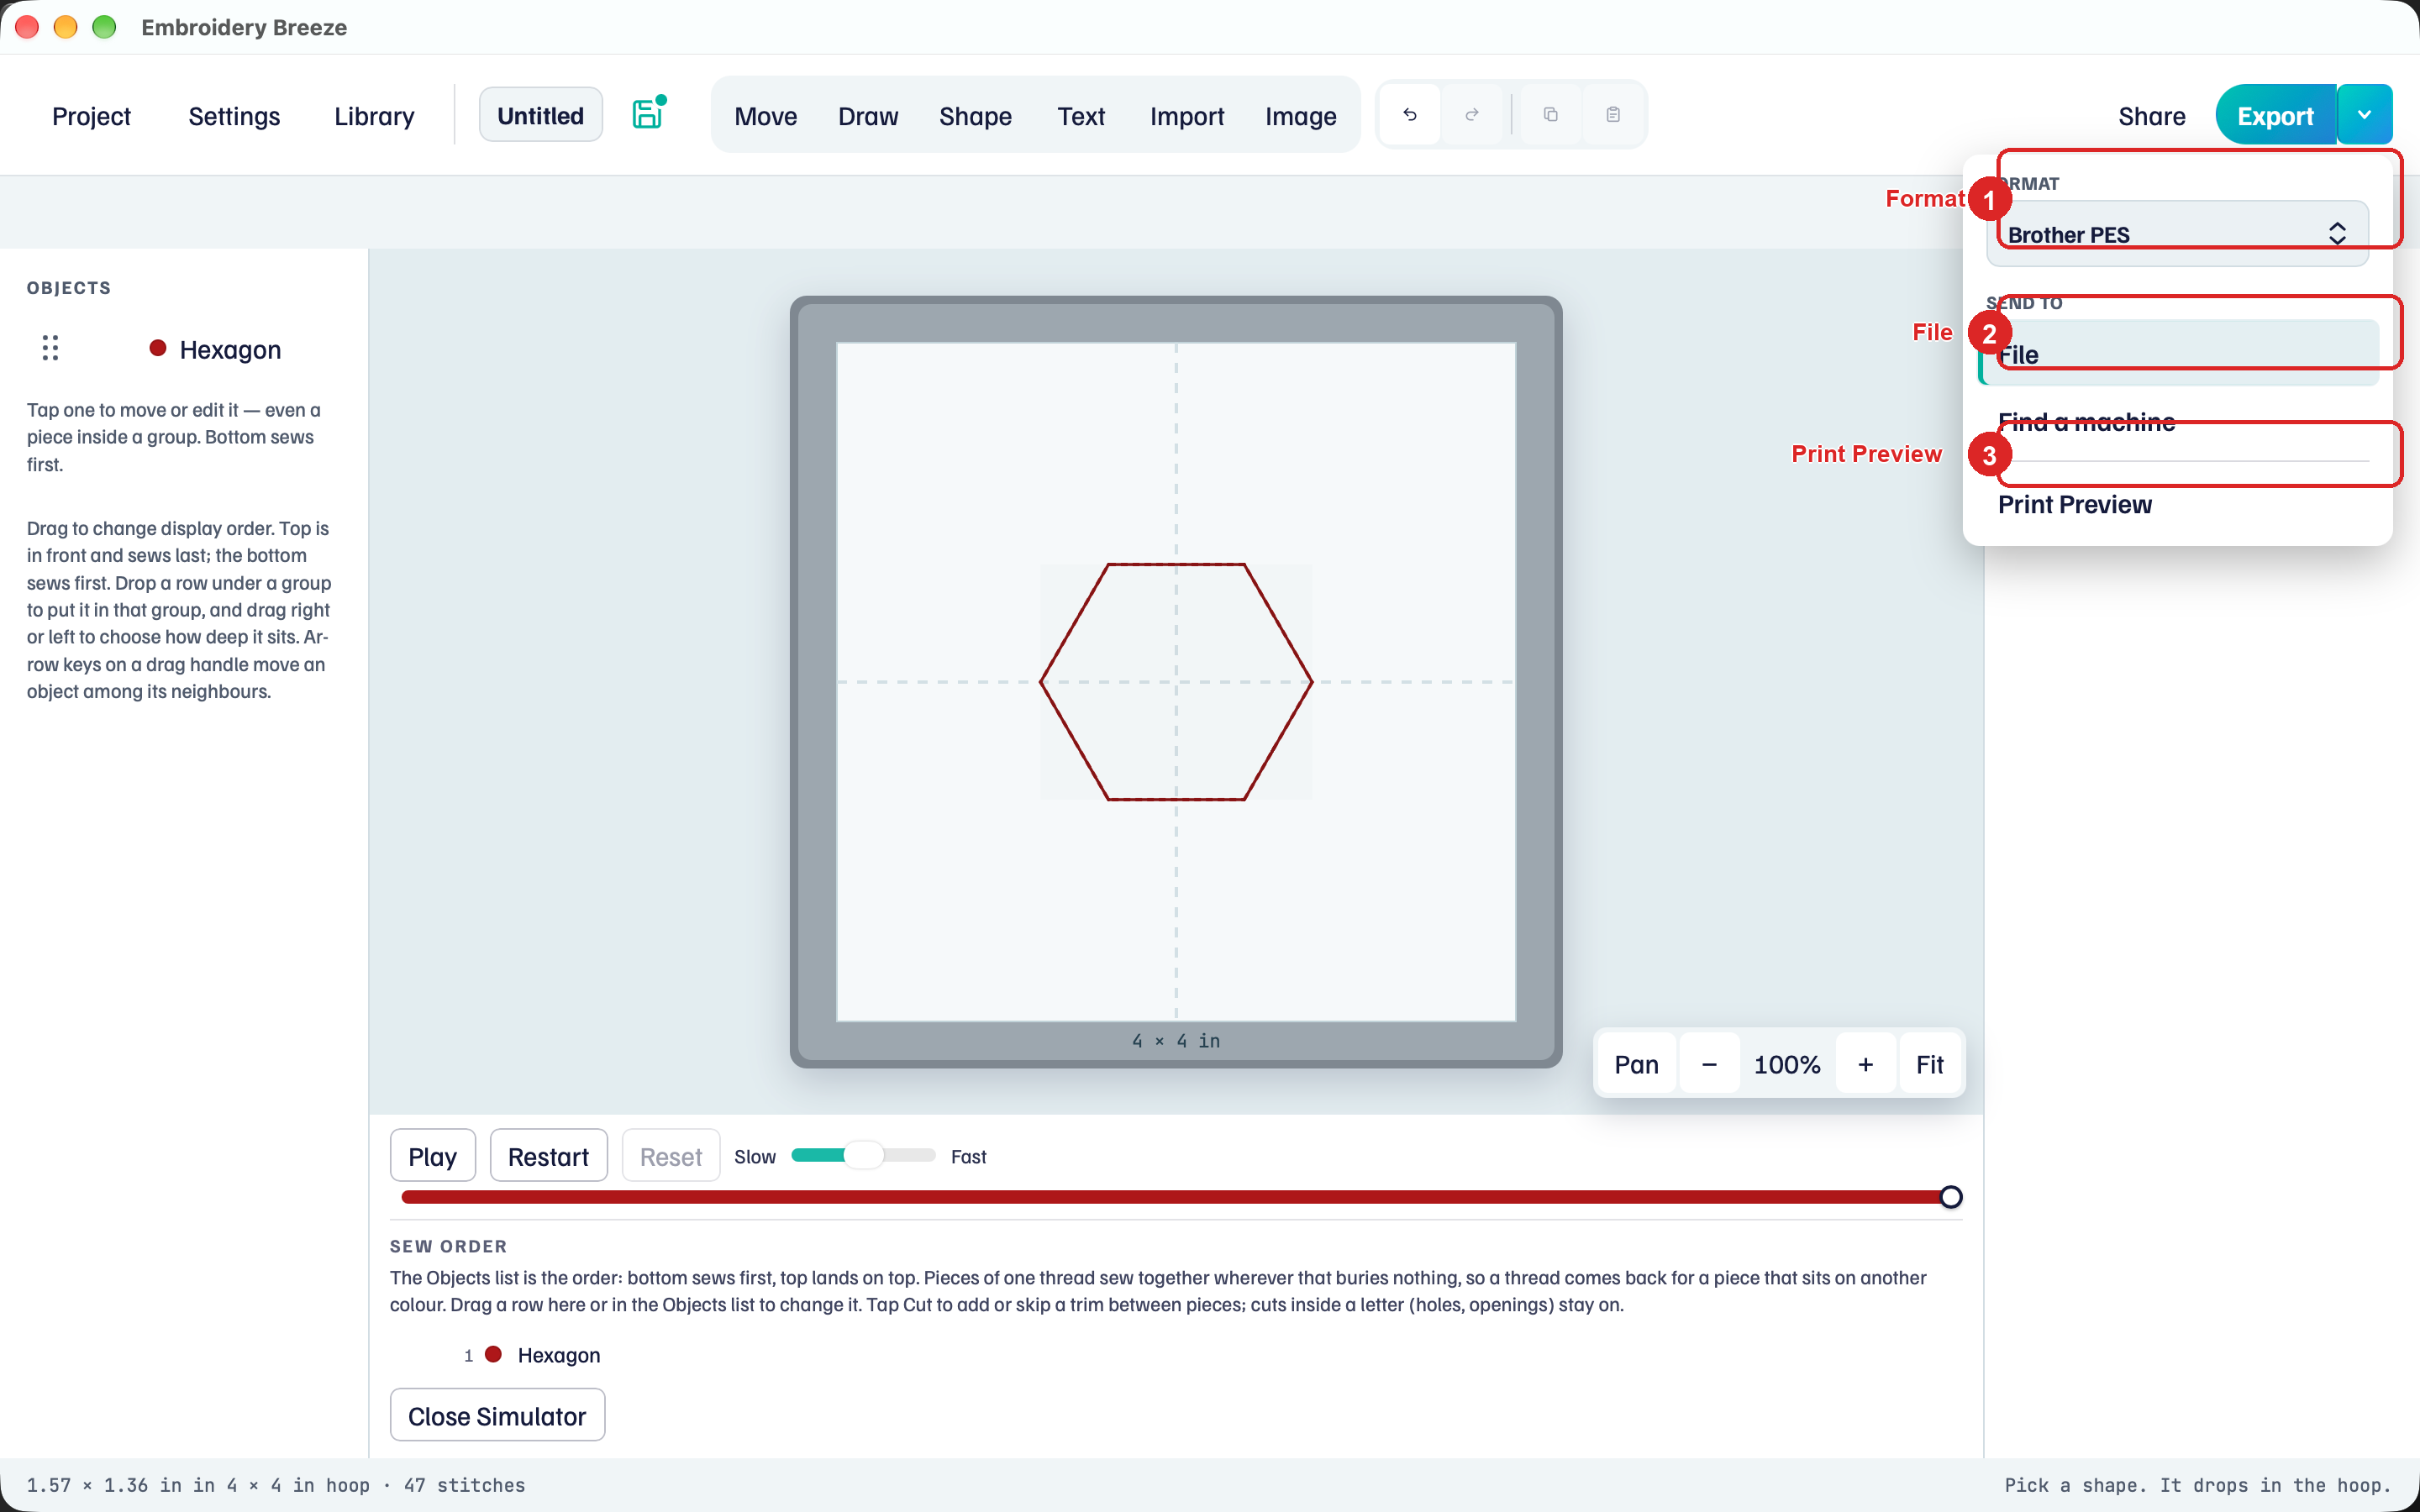
- Click the caret next to Export.
- Under Format, choose the format your machine uses.
- Under Send to, click File.
- Click Export and choose where to save the file.
- Open that file on the machine.
Export remembers the last format. Print Preview in the same menu opens a real-size PDF of the stitches. Print that PDF at 100% (Actual Size) and tape the paper on the garment.
Notes
- Image is a tracing picture. It never sews.
- Project → Open opens a
.breezefile. Import adds a machine file, an SVG, or another.breezefile to this hoop. - You edit shapes and stitch settings. You do not edit needle points one by one.
Next: Centerline and outline.