
Start
Centerline and outline
SummaryTwo ways an object can be sewn: along a line, or as the border of an outline you can fill.
Each object to sew is either Centerline or Outline.
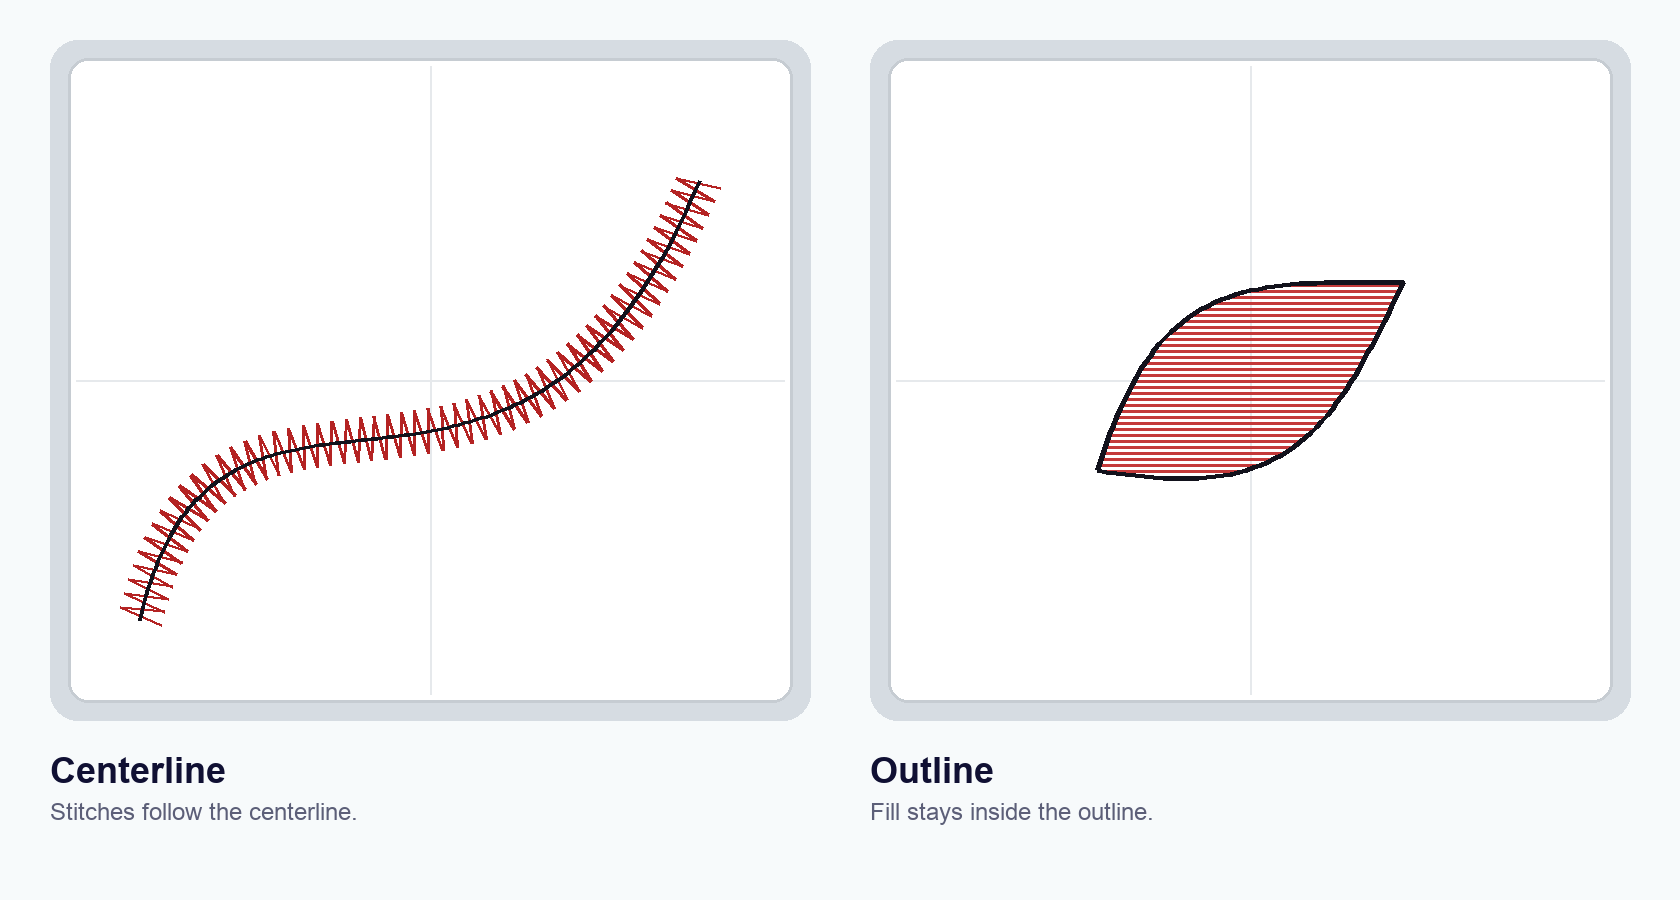
Centerline is a stroke along the line you drew, such as a stem. That line is the path. Outline is a closed shape. Fill stays inside the outline.
| Centerline | Outline | |
|---|---|---|
| From | Draw, Line, Curve | Oval, Polygon, Star, letters, or Convert to Outline |
| Path | The line the needle follows | The border of an area |
| Satin | A column along the line. Satin width is the stroke | A column on the border, or a satin fill inside the border |
| Fill | A closed drawn path can fill its interior | Fill covers the inside. Border stitch is separate |
An object is one or the other. Use Convert to Outline to change a centerline into an outline.
Centerline: stitches that follow the line
Line, Curve, and Draw are Centerline. The path is the spine. Stitches follow that spine, like a ribbon laid along a vine.
This line is a centerline object with Satin. The column sits on the path you placed.
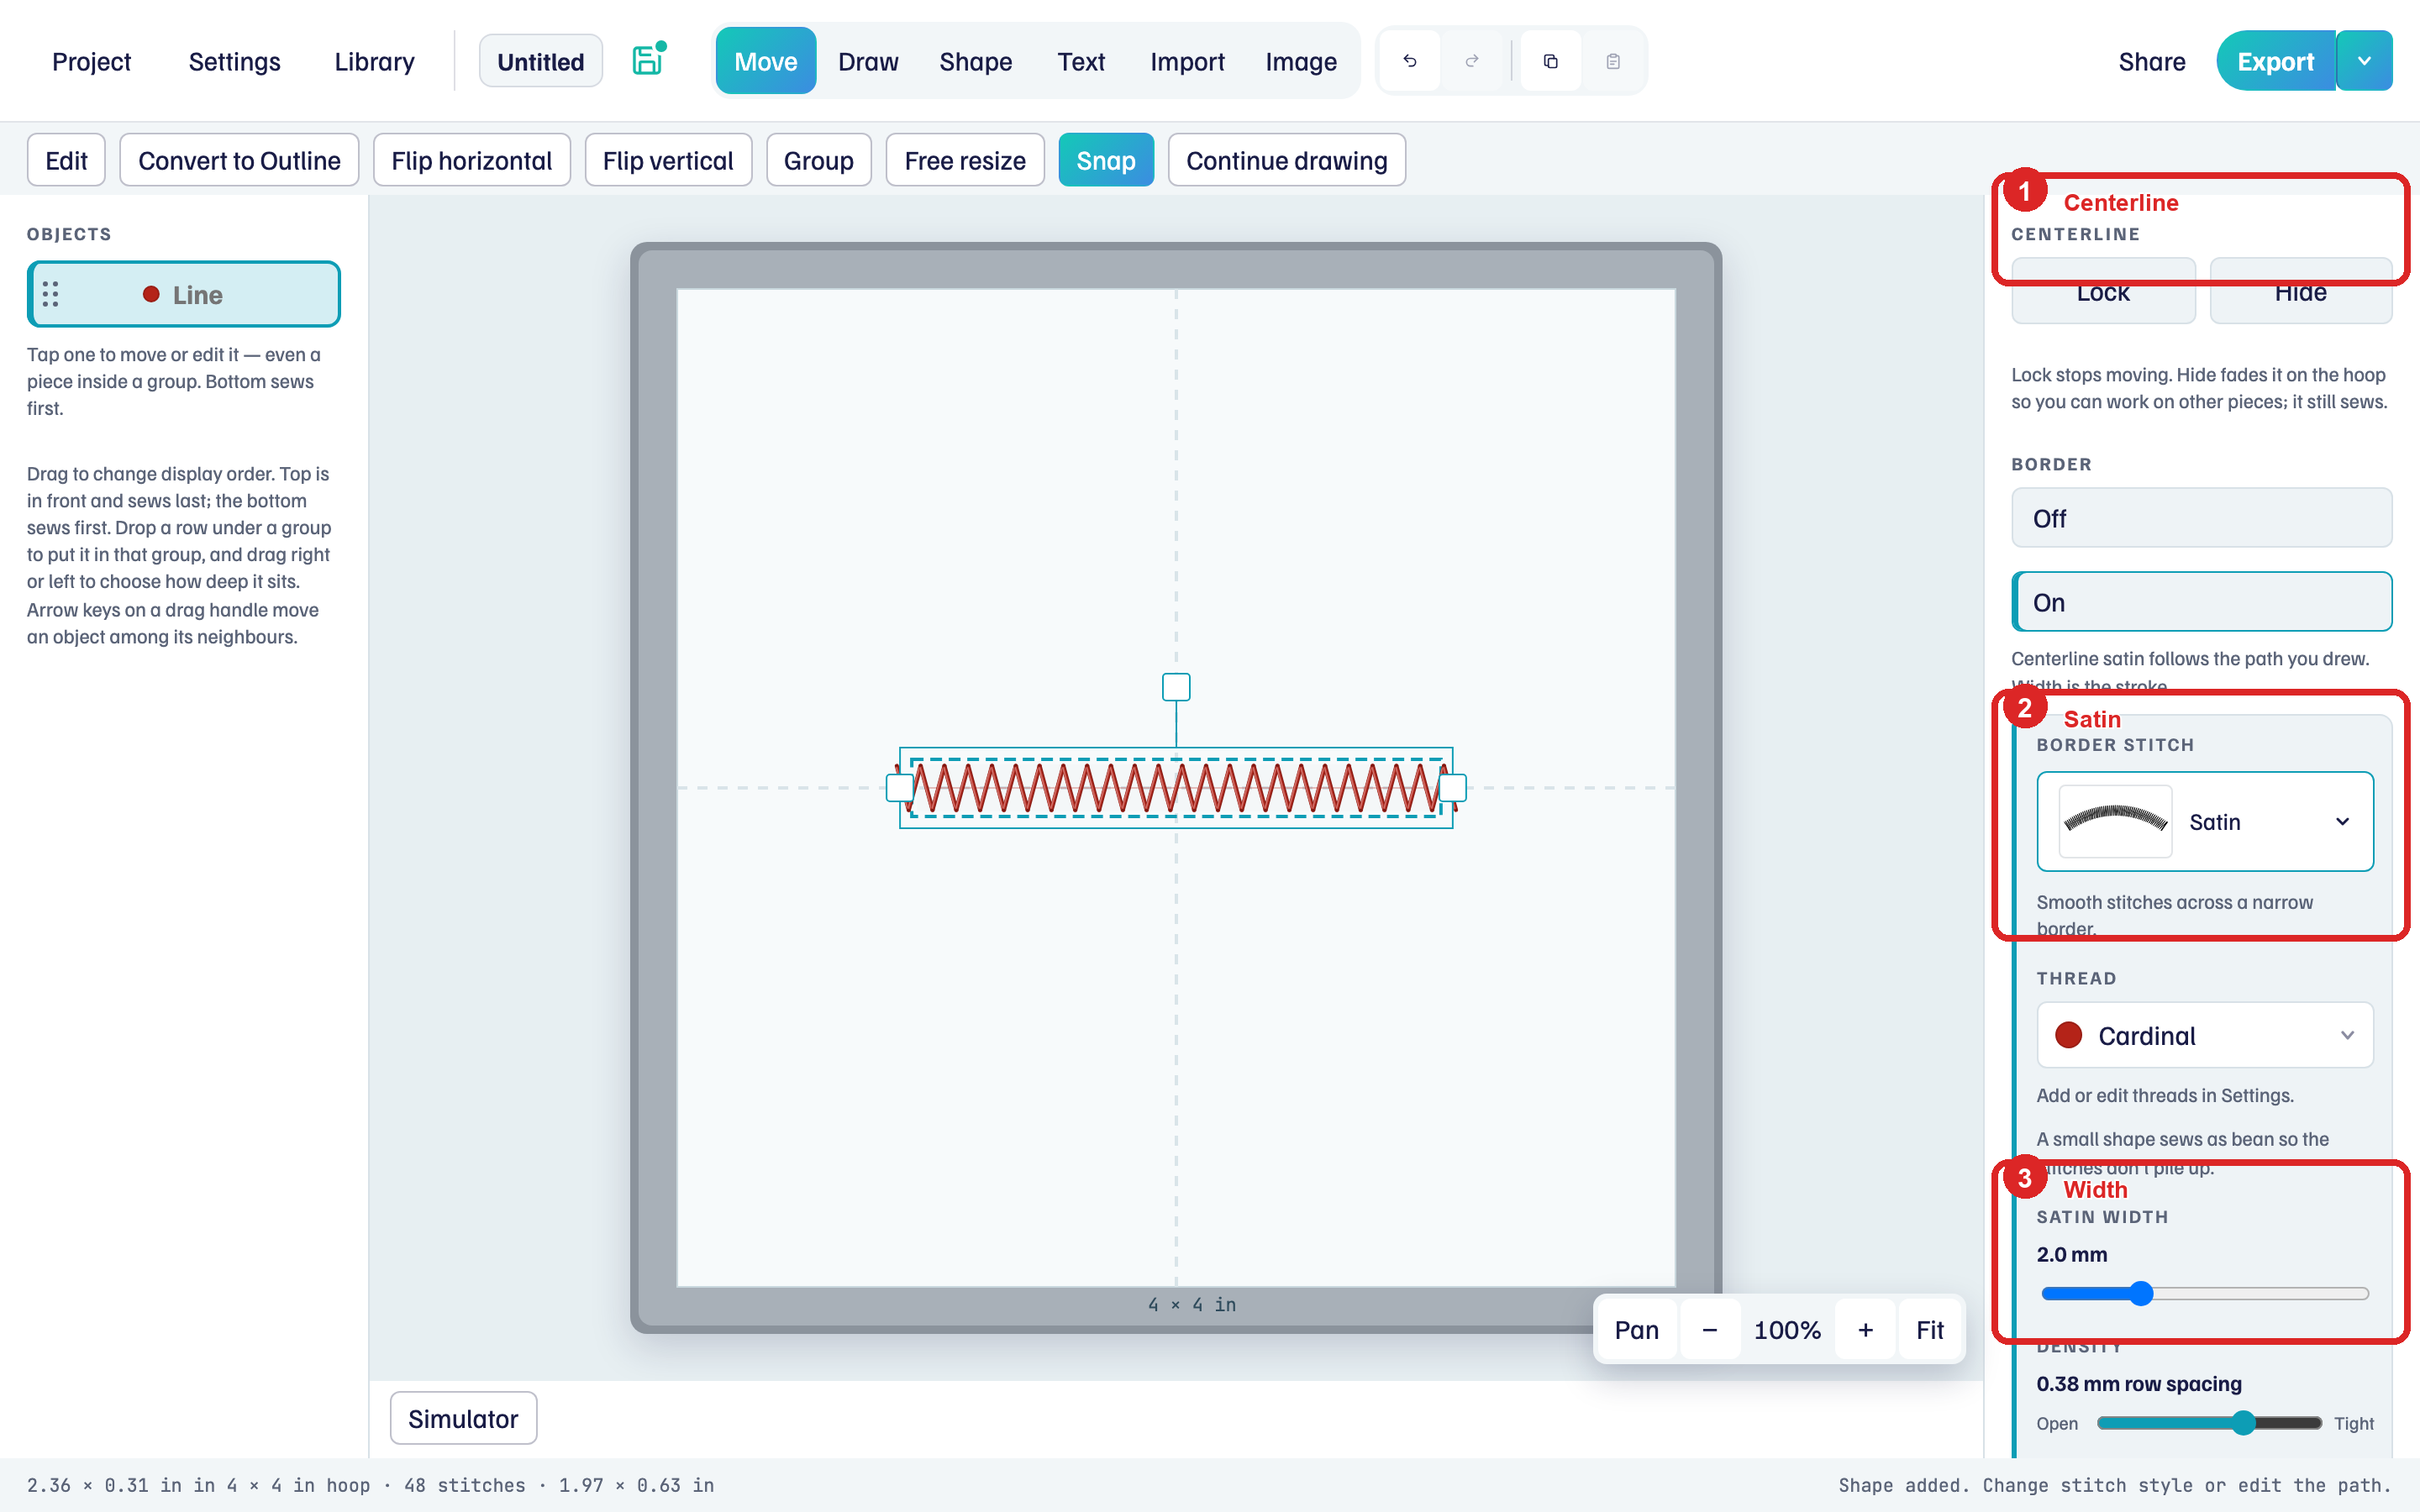
- Centerline at the top of the right panel is the object type.
- Border stitch is Satin. Fine line and Bean are the other everyday choices.
- Satin width is how wide the column is. It stays centered on the line.
To place one: click Shape, then Line. Under Border, choose Satin, then drag Satin width.
Very small centerline satin sews as Bean so the stitches do not pile up.
Outline: a shape with an inside
An oval, polygon, or star is Outline. The path is the border. You can run a stitch along that border, fill the inside, or both.
This hexagon is an outline object with Fill on. The stitches stay inside the border.
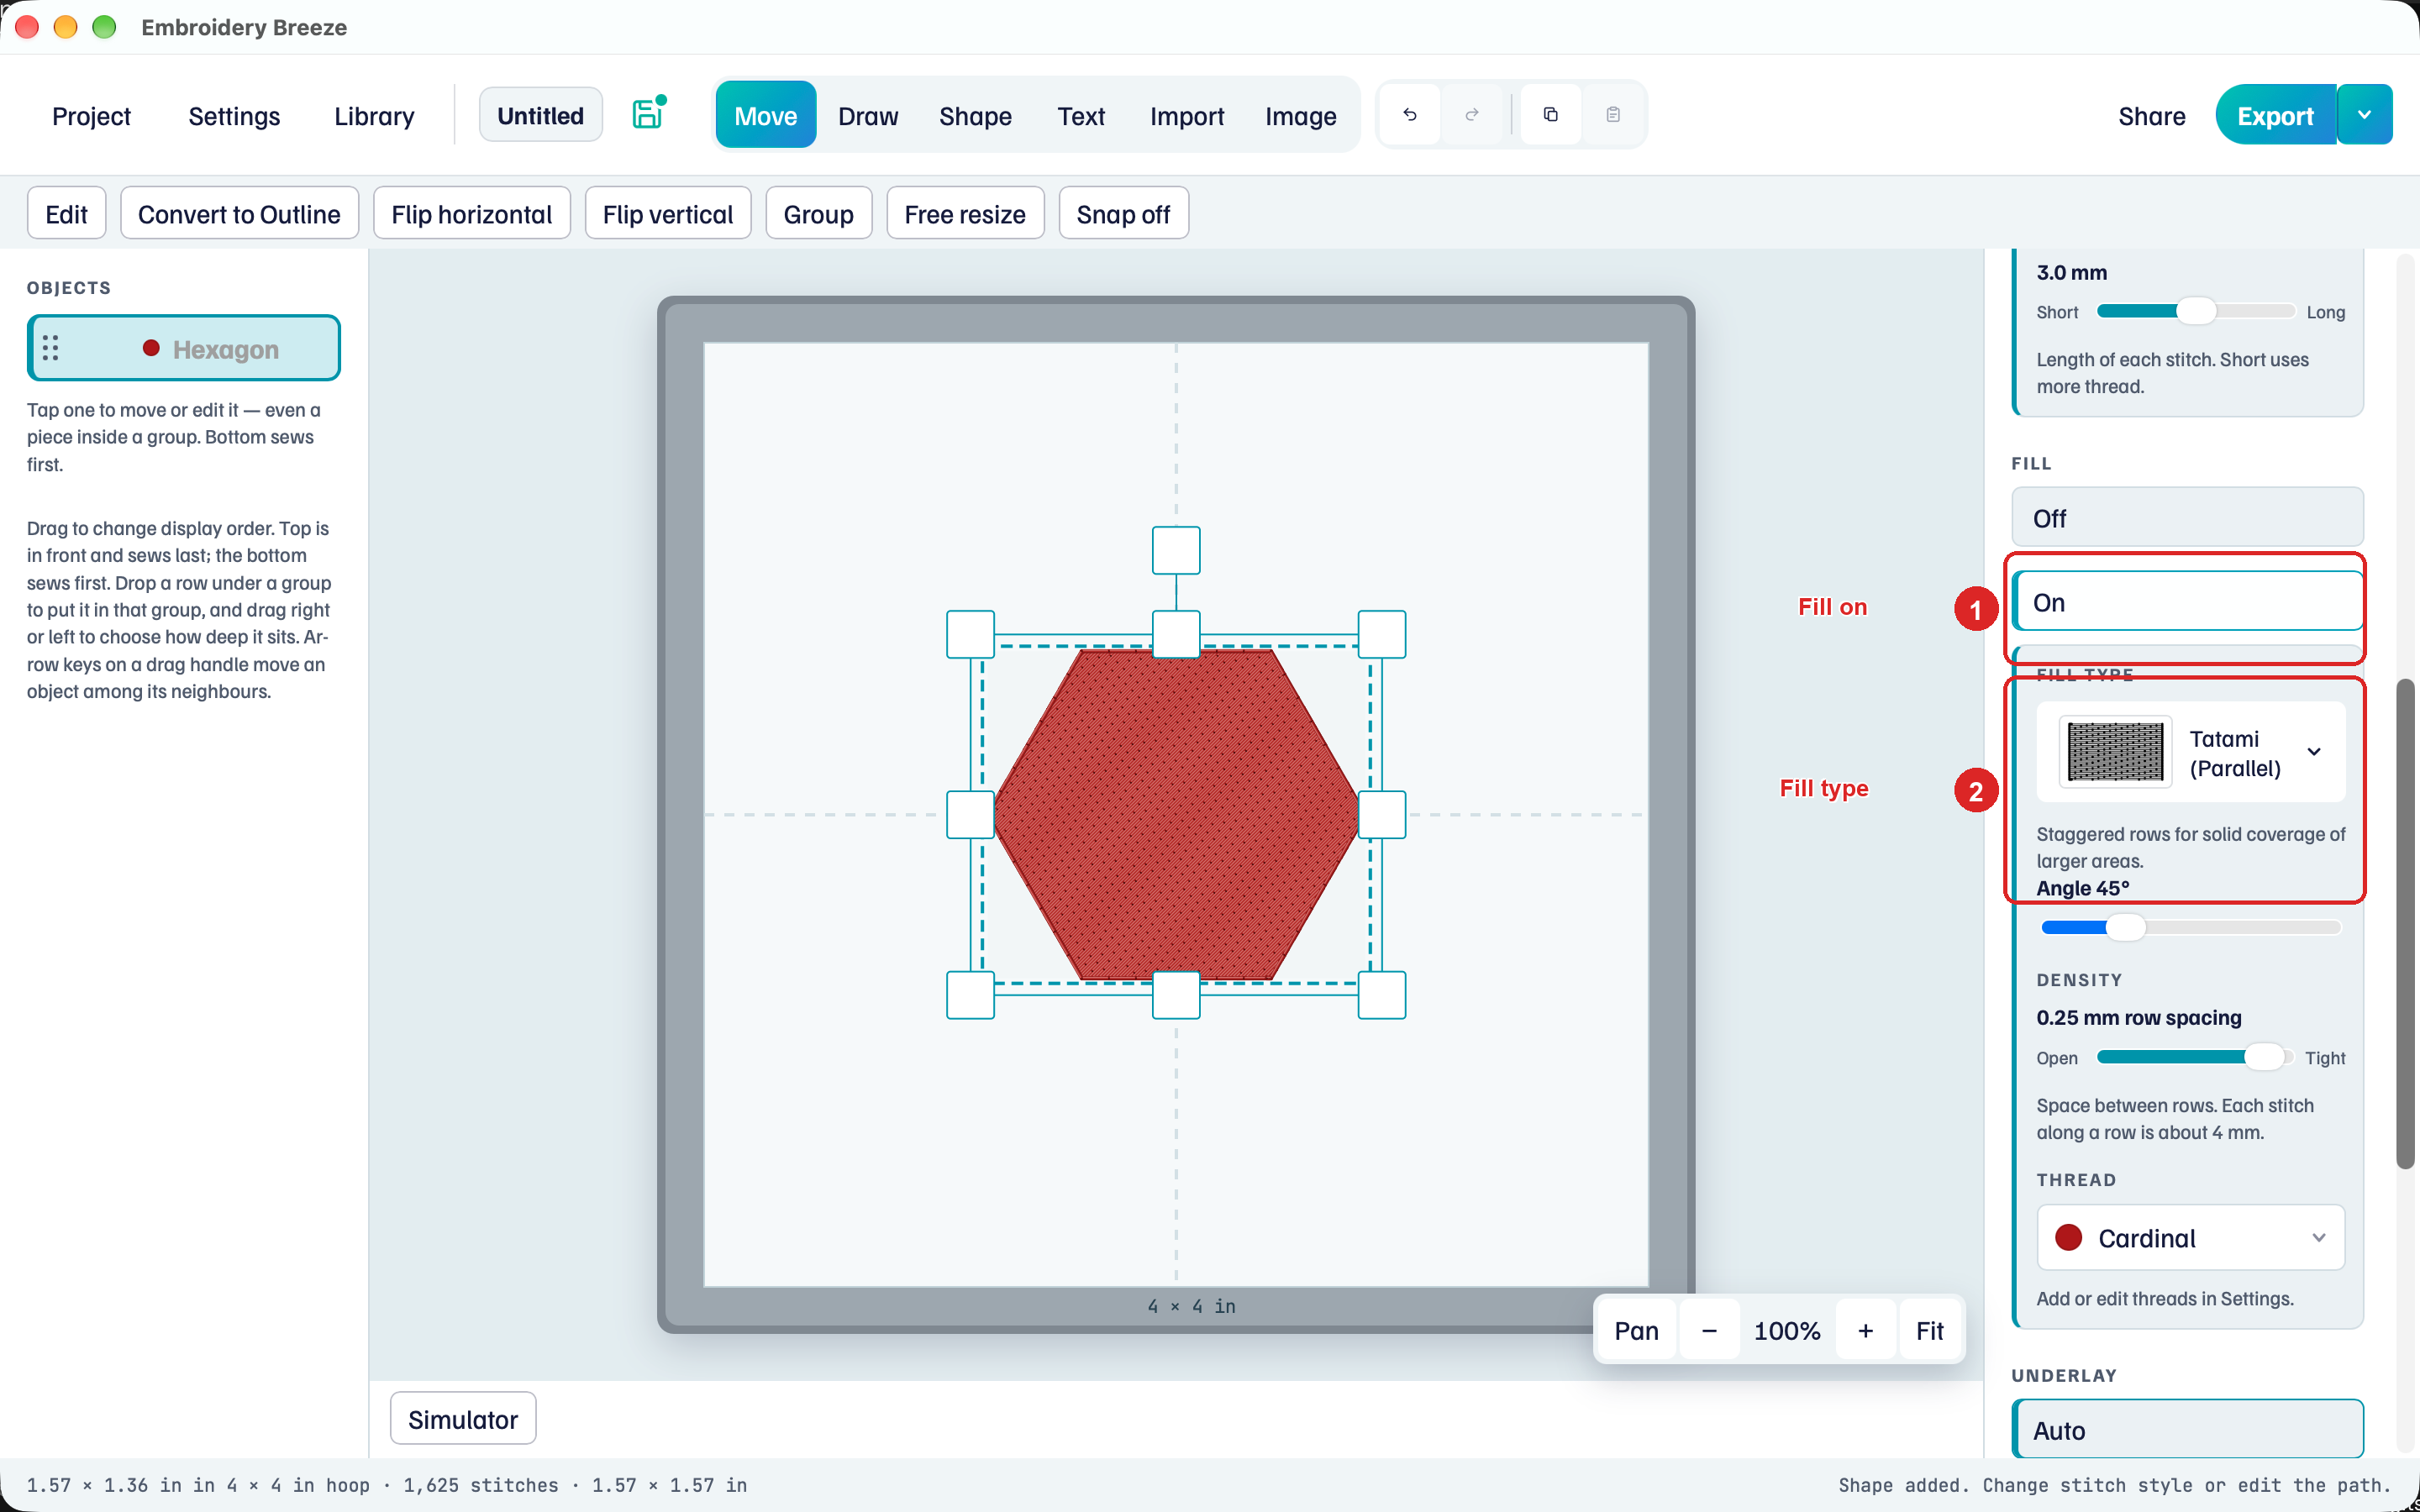
- Fill On covers the inside of the shape.
- Fill type is Tatami (Parallel). Density and Angle change how the rows run.
A new oval, polygon, or star starts with Fill off and a Fine line border. Turn Fill on to cover the inside. Border and fill can use different threads.
Convert to Outline
Use this when a drawn stroke should become a leaf, a petal, or any closed ribbon with a real inside.
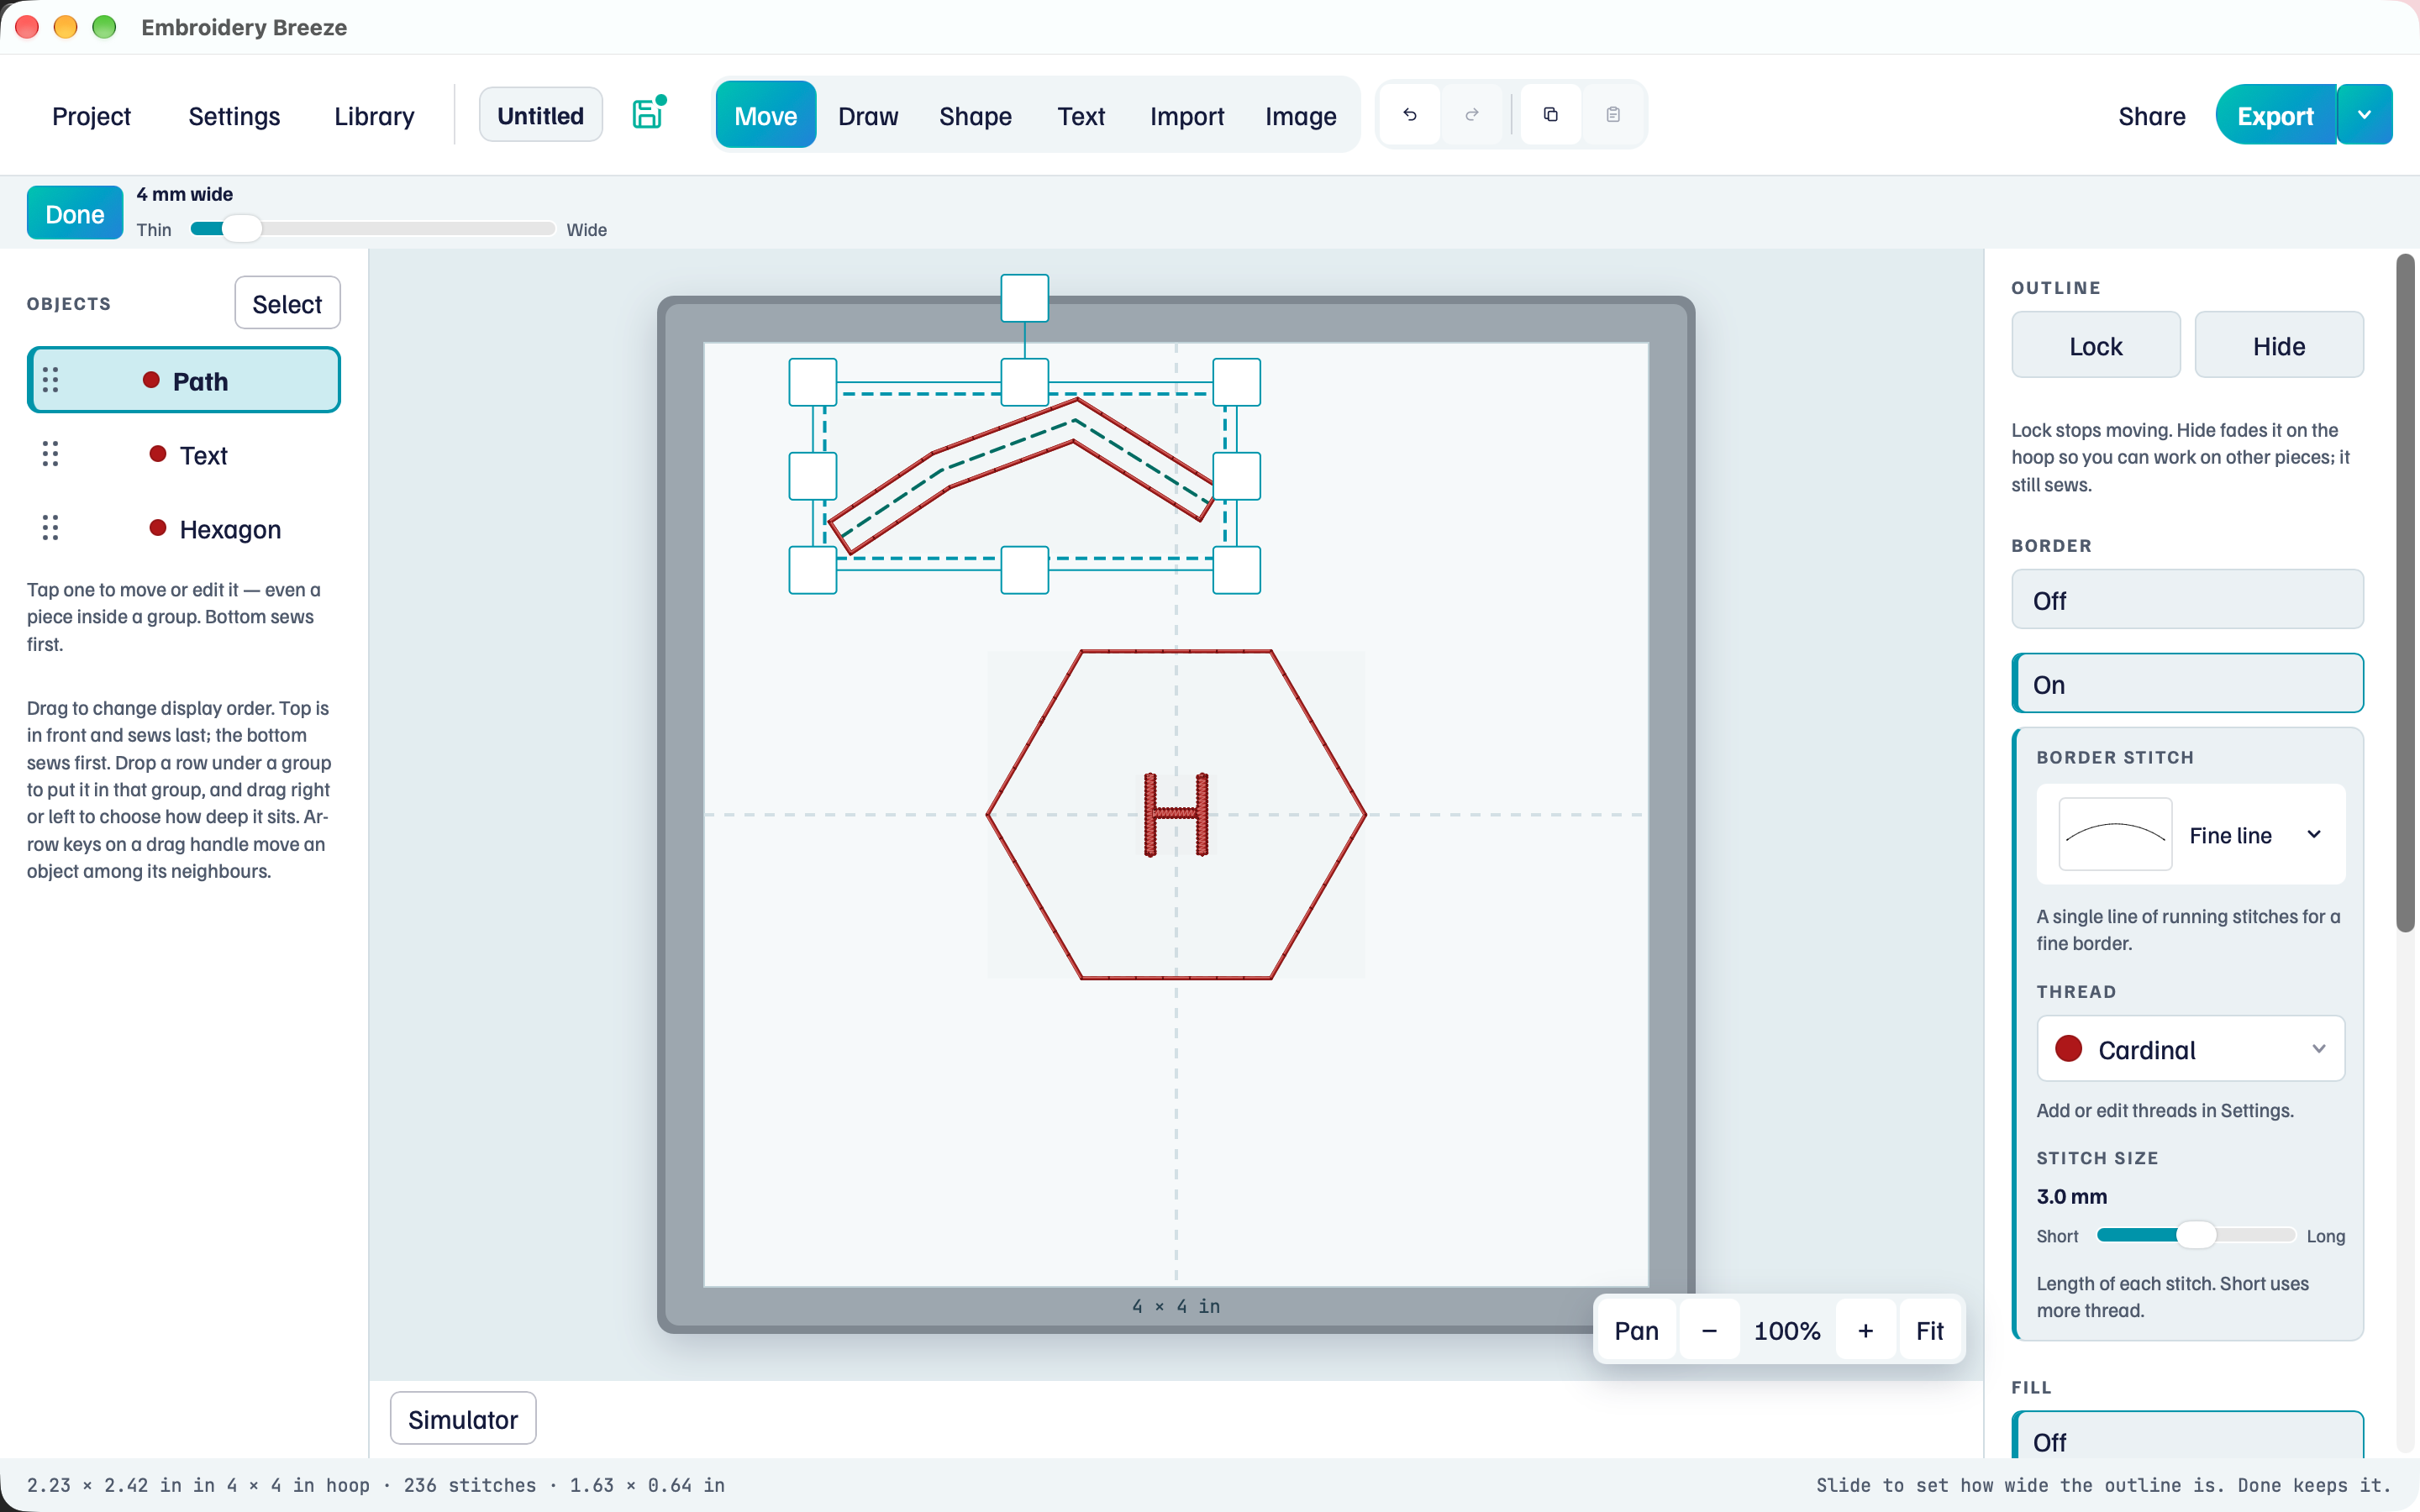
- Click Draw. Click two or three points for a short open stroke. Click Done.
- Click Convert to Outline on the tool row under the top bar.
- Drag Thin toward Wide. The path becomes a closed border around the stroke.
- Click Done. Properties now say Outline.
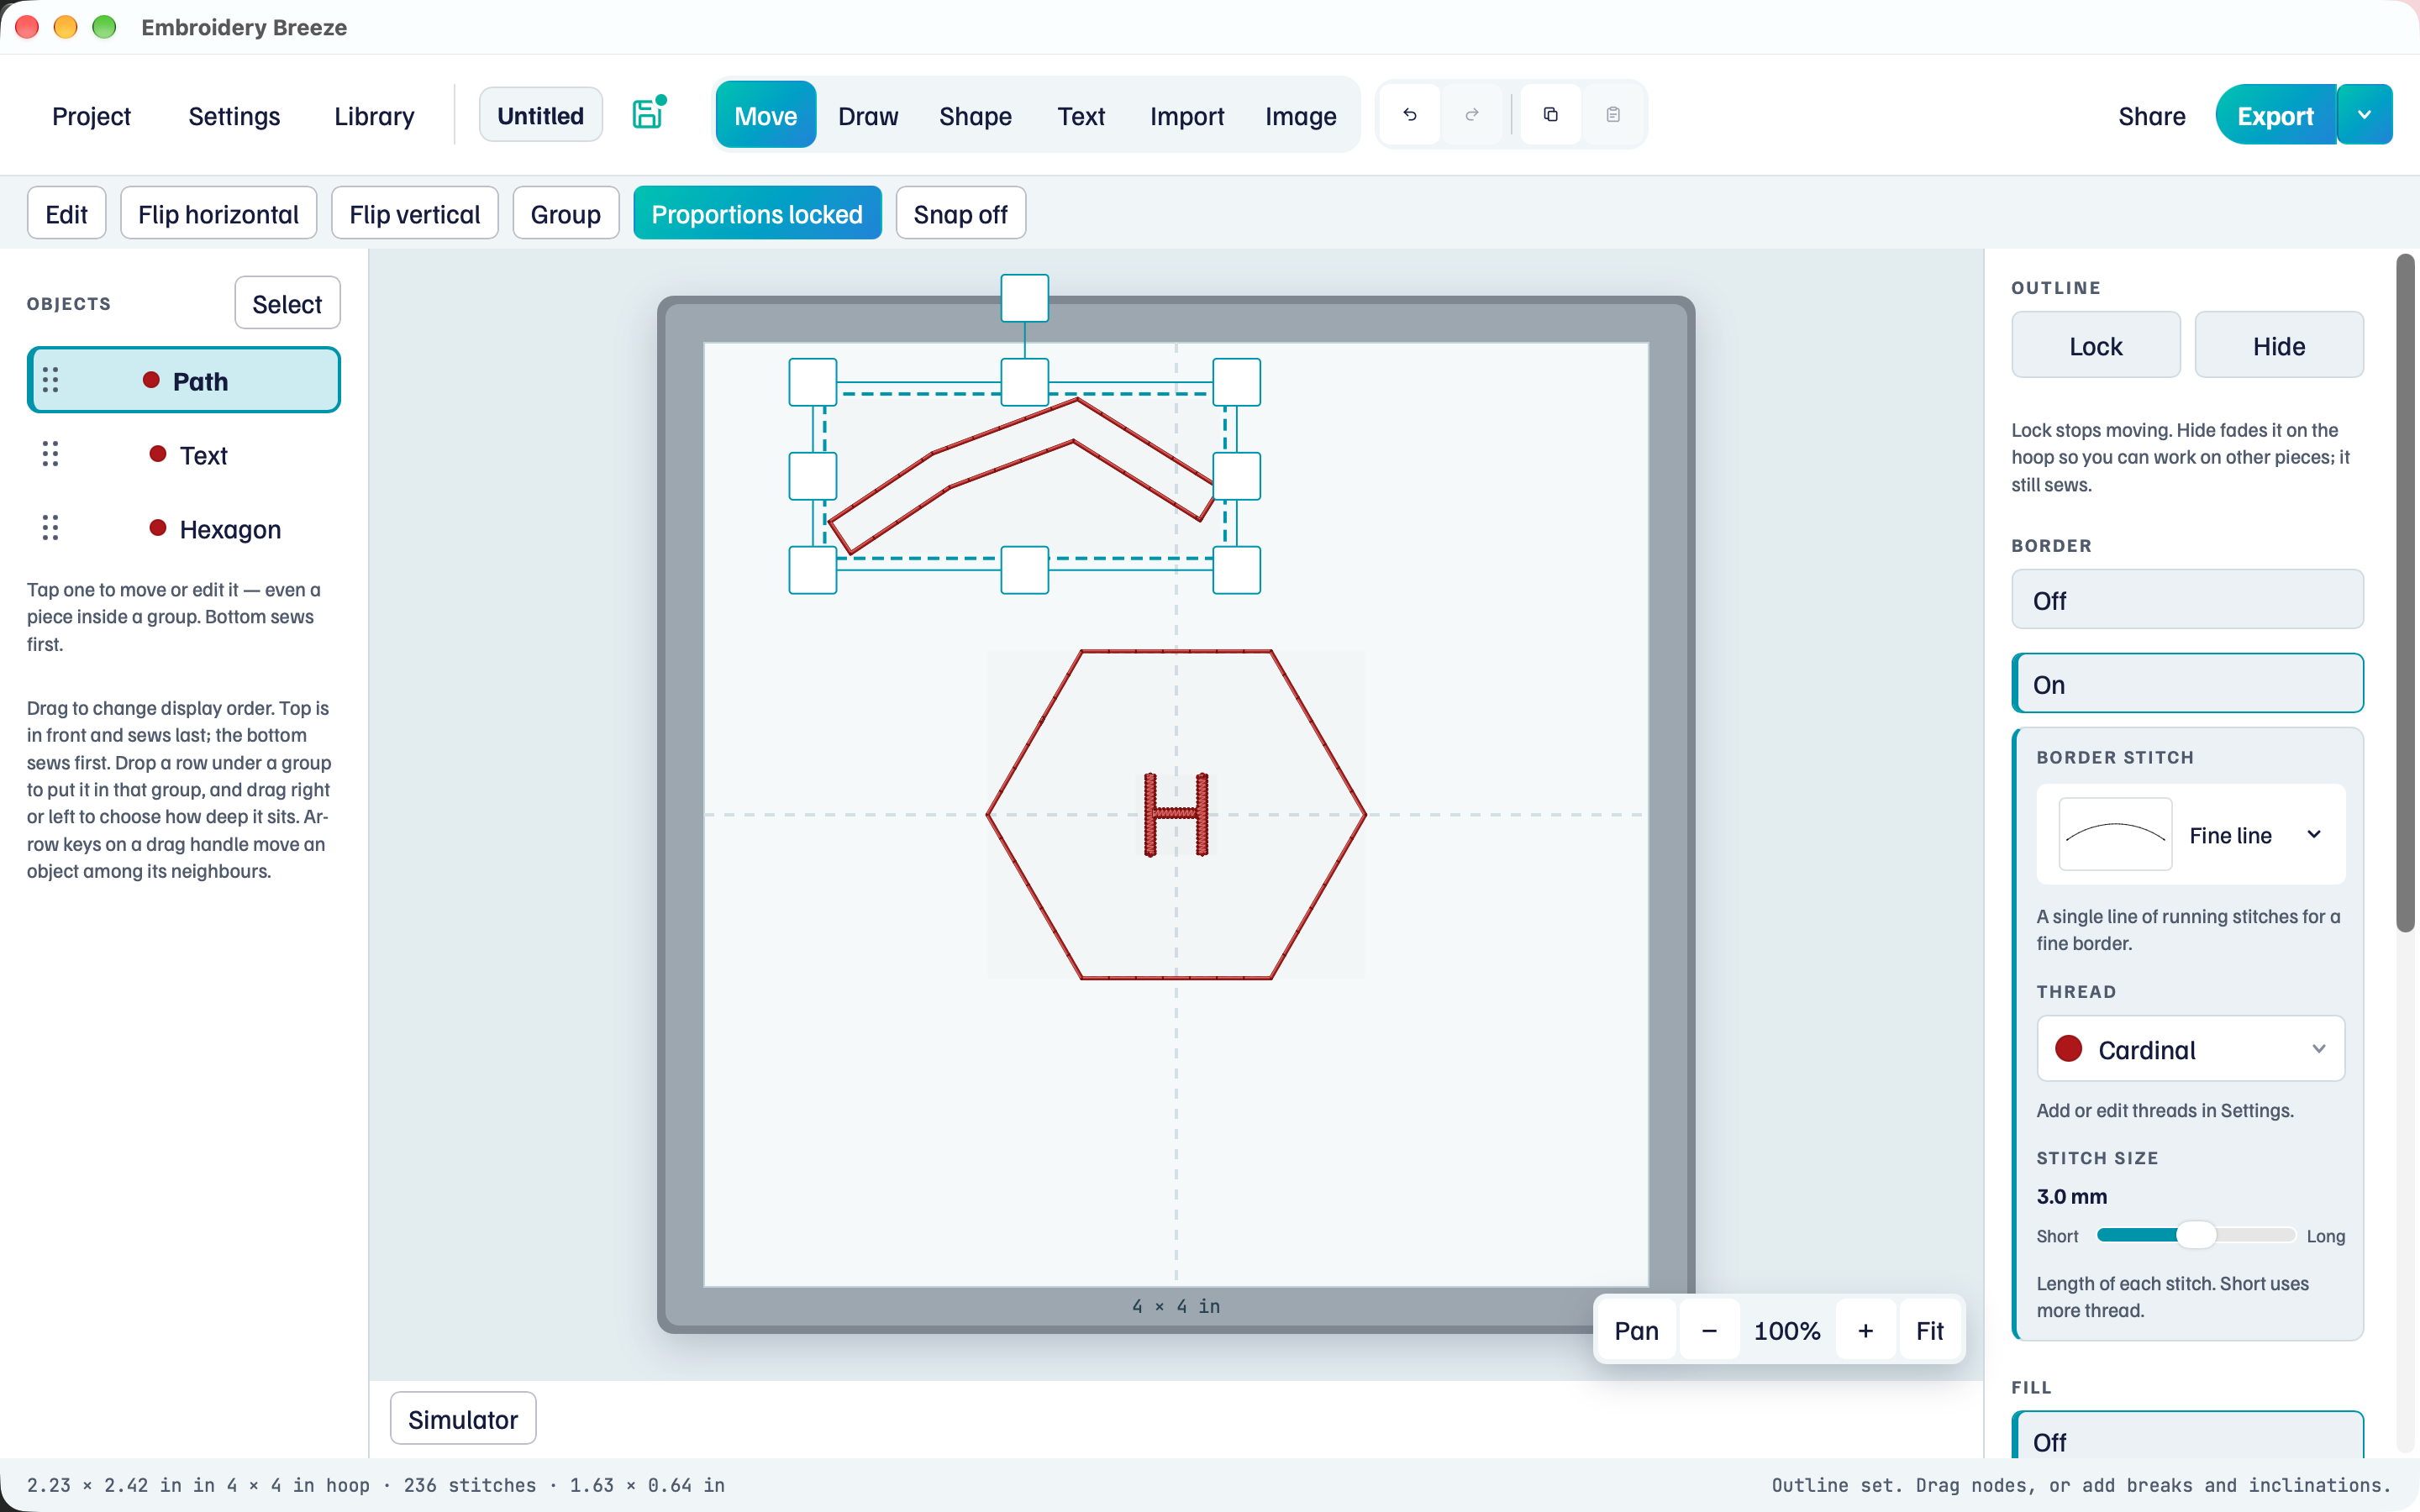
On a closed shape, the same command grows or shrinks the border (Smaller / Bigger). A negative amount puts a hole in the middle.
After convert you can turn Fill on, choose Satin, and add Breaks and Inclinations. That is the same construction a digitized letter uses.
Close a drawn path without converting
You can also click the first node of a Draw path to close it, then turn Fill on. The interior fills. The type line still says Centerline: the path is still the spine. Use Convert to Outline when you need a true border, breaks, and inclinations.
When to use which
- Stems, vines, even-width satin: keep Centerline.
- Leaves, petals, badges, filled shapes: use Outline, or convert.
- A name on a towel: Text, which is outline.
The stitch menus themselves are in Stitches and fills.
Next, match the hoop to the frame on your machine: Hoop, fabric, and threads.