
Design
Digitize a font
SummaryTurn a computer font into a reusable embroidery font, then type with it on the hoop.
The font digitizer is where you build a reusable embroidery font. Stitching happens later, when you type on the hoop. Door: Text → Digitize a font, or Digitize a font in the font picker.
For each letter: Outline (the computer face is the starting outline), Breaks to split the outline into sections, then Inclinations across each section for stitch direction.
Open the font digitizer
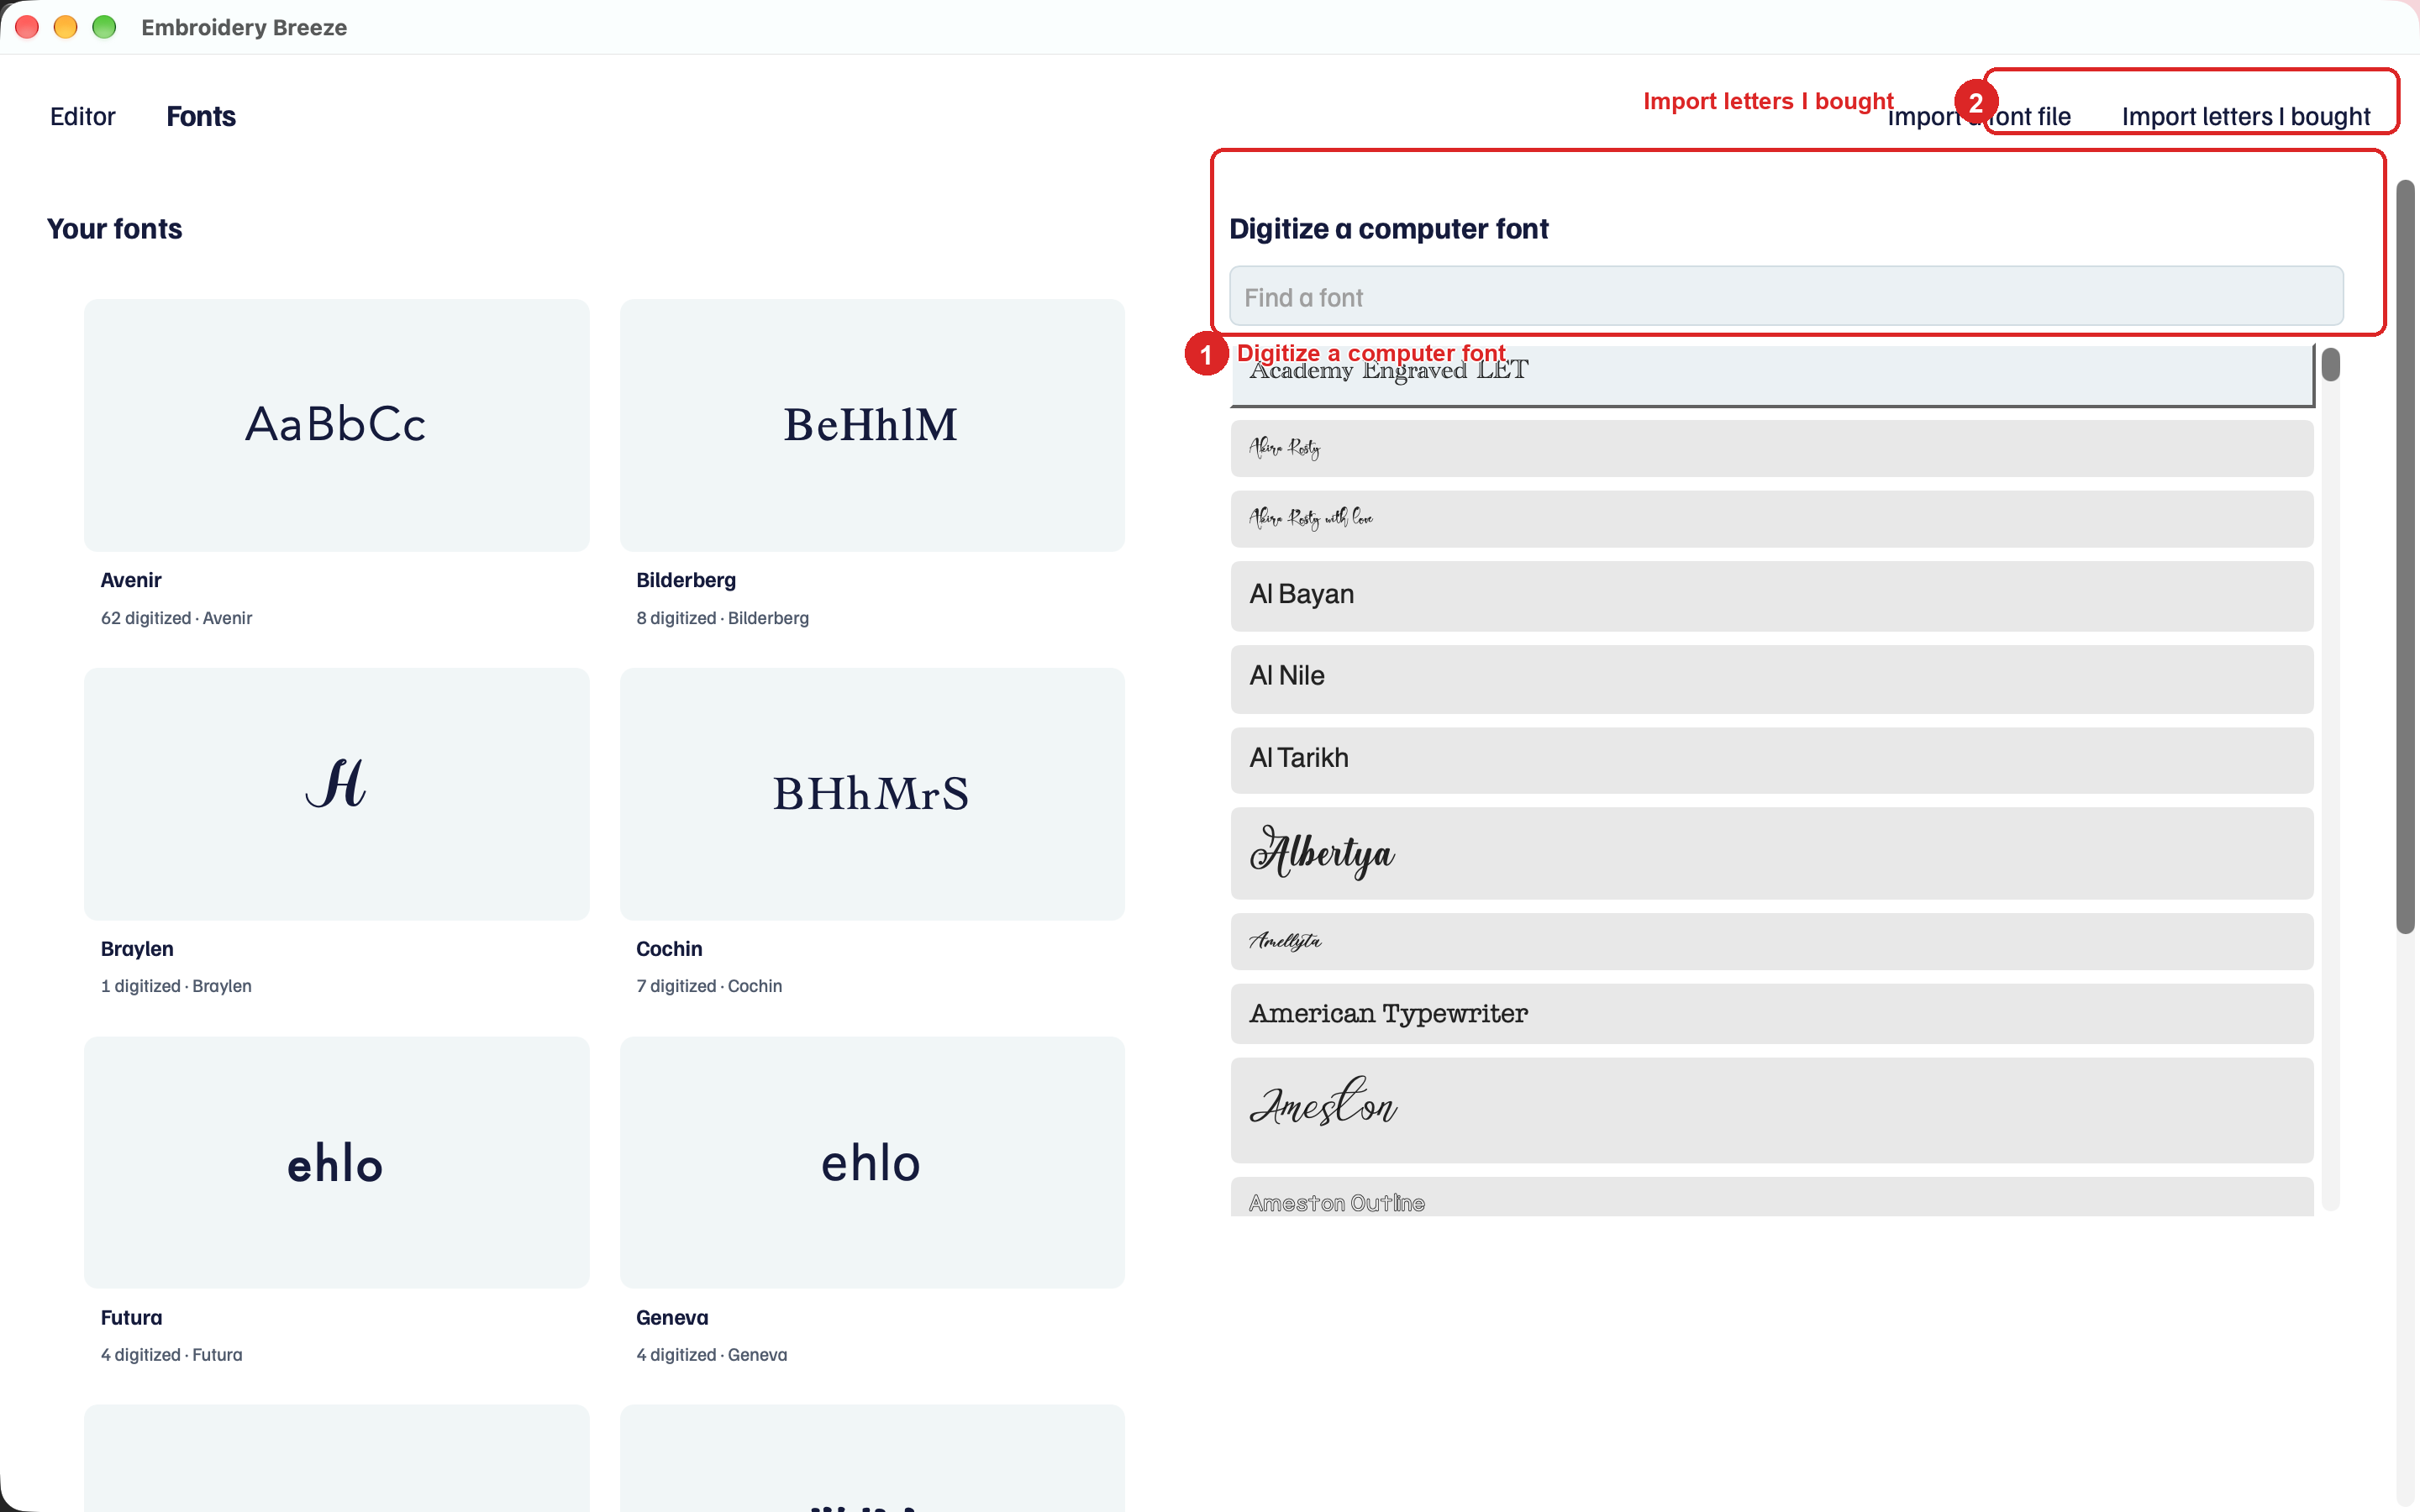
- Click Text, then Digitize a font.
- Pick a simple computer face already on this computer.
- Name the embroidery font.
Editor on the left returns to the hoop. Fonts lists fonts on this computer. Save keeps the font in this .breeze file and in Fonts on this computer. Export font file writes a .breezefont file other projects can import.
Outline, Breaks, Inclinations
The top rail is Outline, Breaks, and Inclinations. Letters are in the left list. Digitized letters are marked.
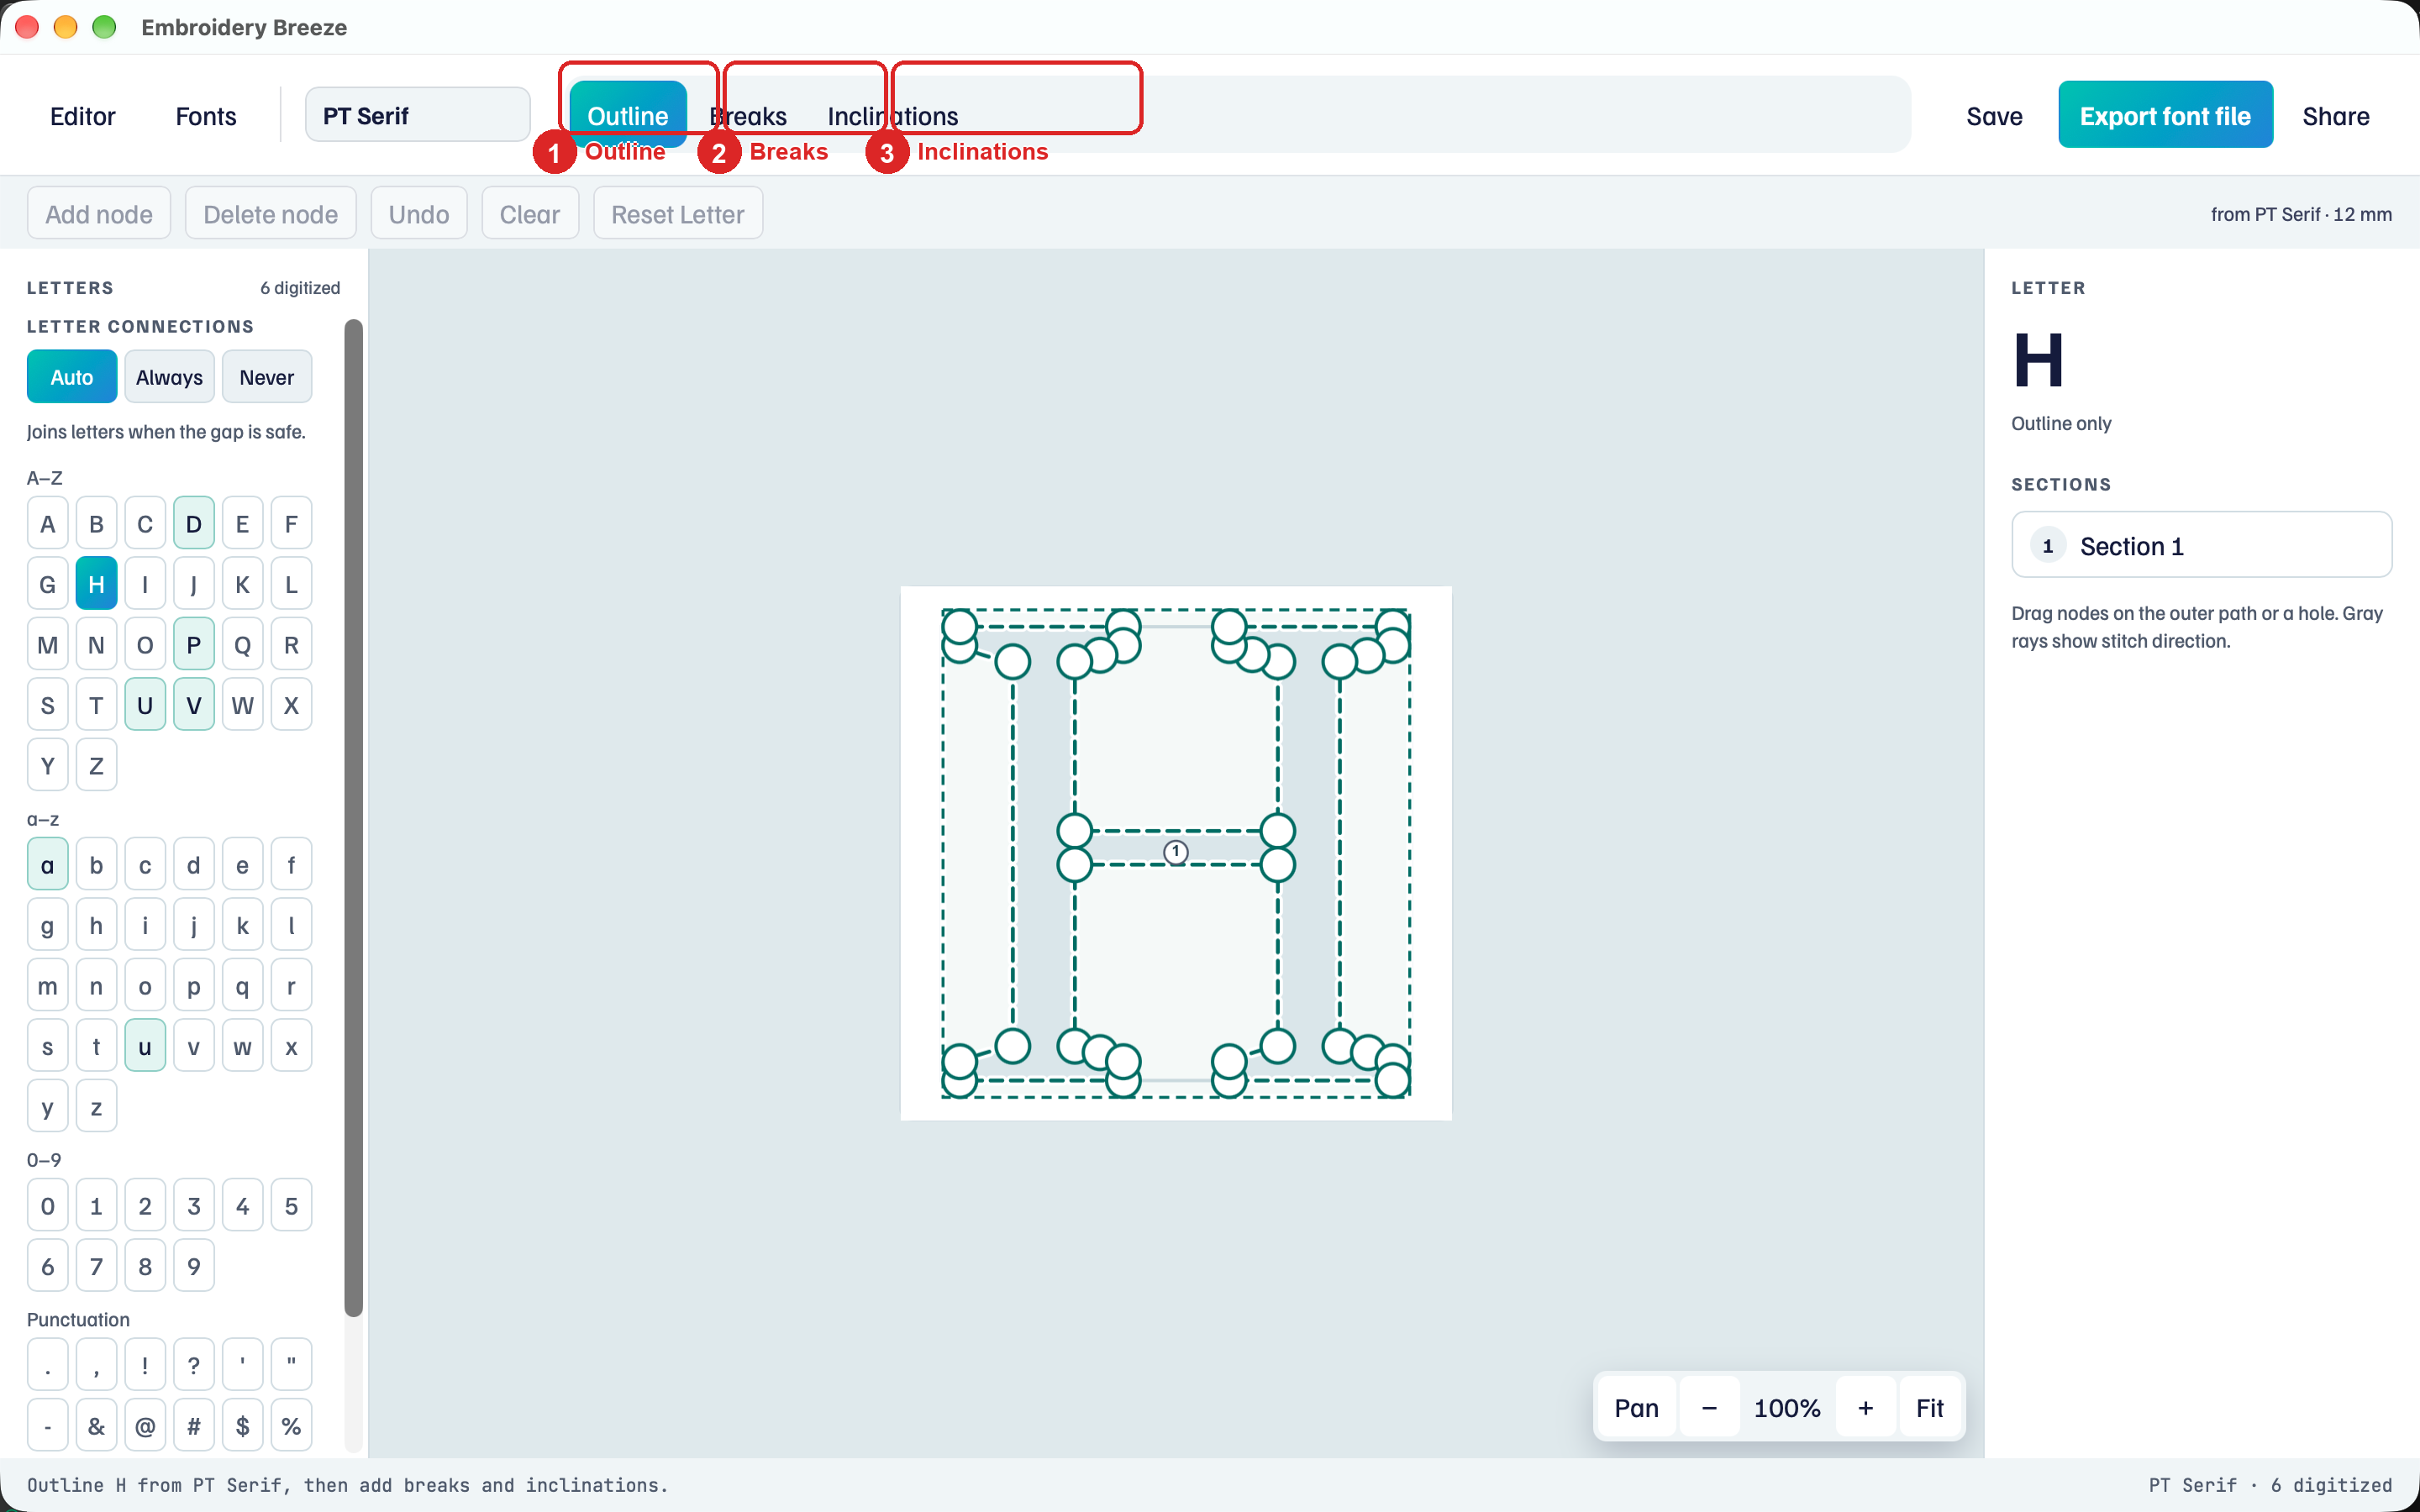
- Select H (or another letter).
- Stay on Outline. The computer shape is already there. Drag nodes on the outer path or a hole.
- Gray rays show stitch direction in each section.
The right panel says Letter, the character, and Sections. Outline only means the outline is there and you still need inclinations. Digitized means the letter is ready to type.
Split with Breaks
Breaks (red walls) split the letter into pieces, such as the stems and the bar of an H.
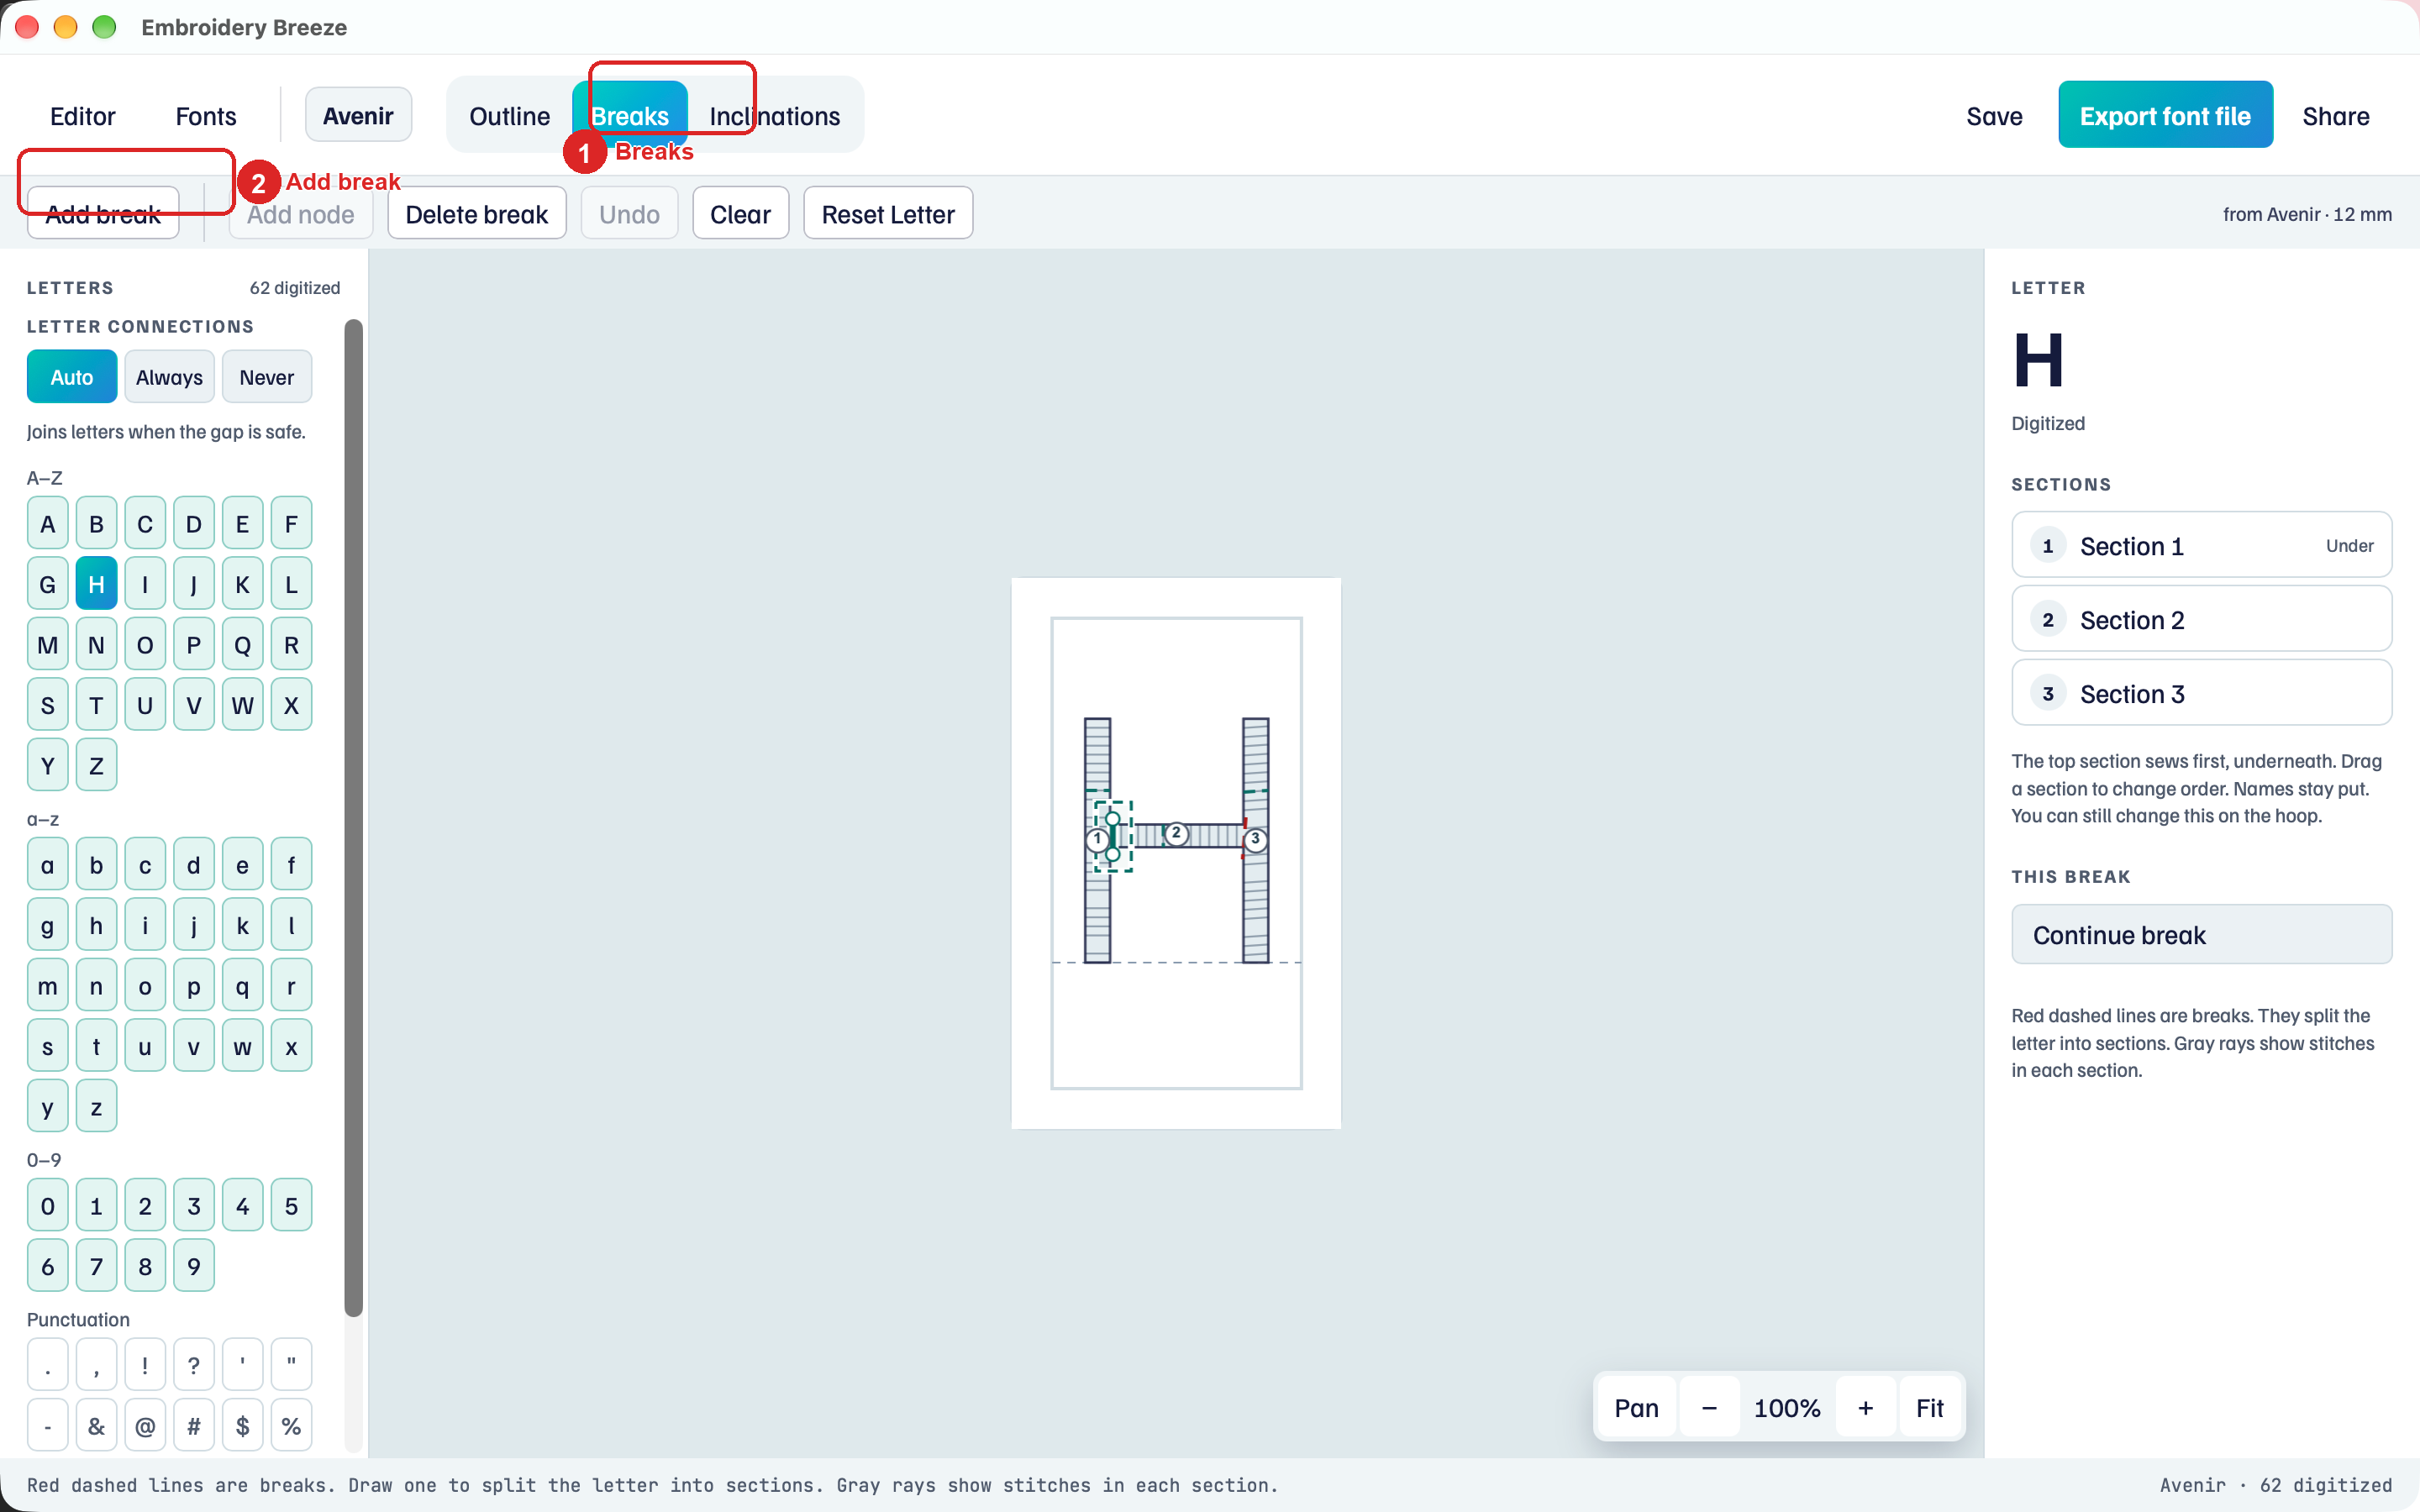
- Click Breaks.
- Click Add break.
- Tap two points on the outline to place a wall. Finish break when the wall is right.
- Click Done.
Delete break removes the selected wall.
Inclinations
Inclinations (teal) set stitch direction in a section.
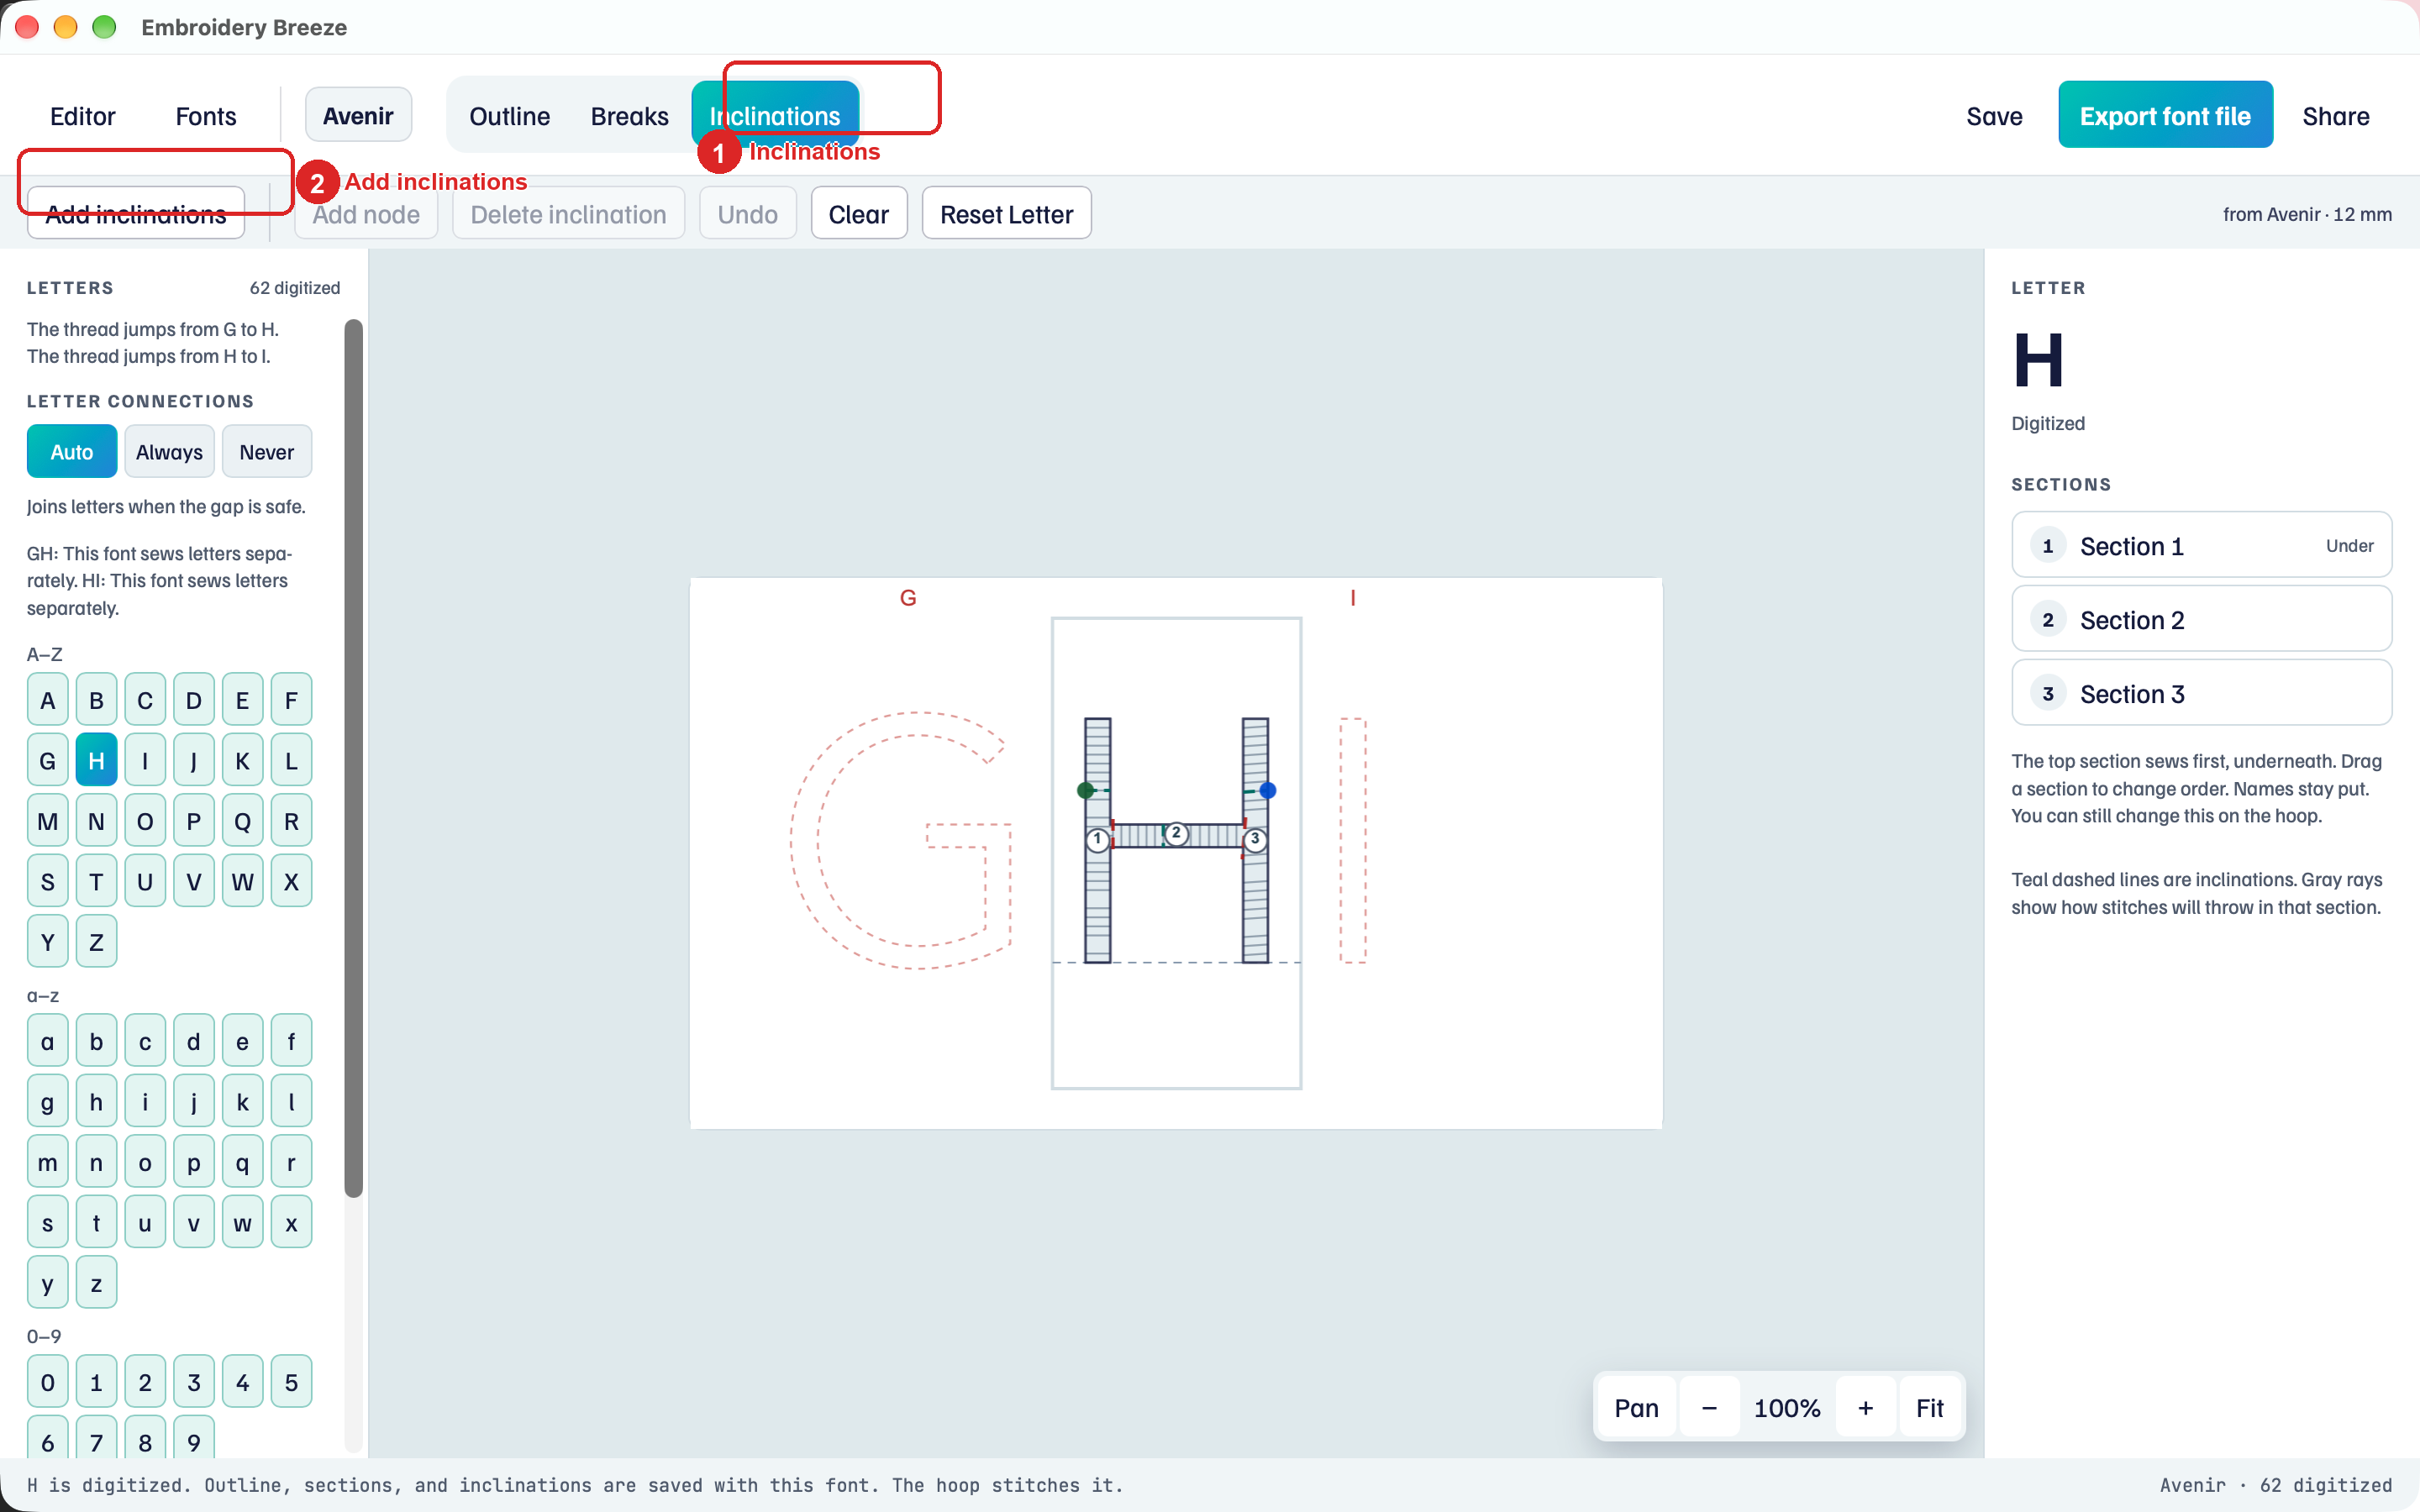
- Click Inclinations.
- Click Add inclinations.
- Tap two points across a piece. Keep adding pairs.
- Click Done.
A letter is not digitized until it has a closed outline and at least one inclination.
Sections and sew order
Sections lists each piece. The top row sews first (underneath). Drag a row to change sew order.
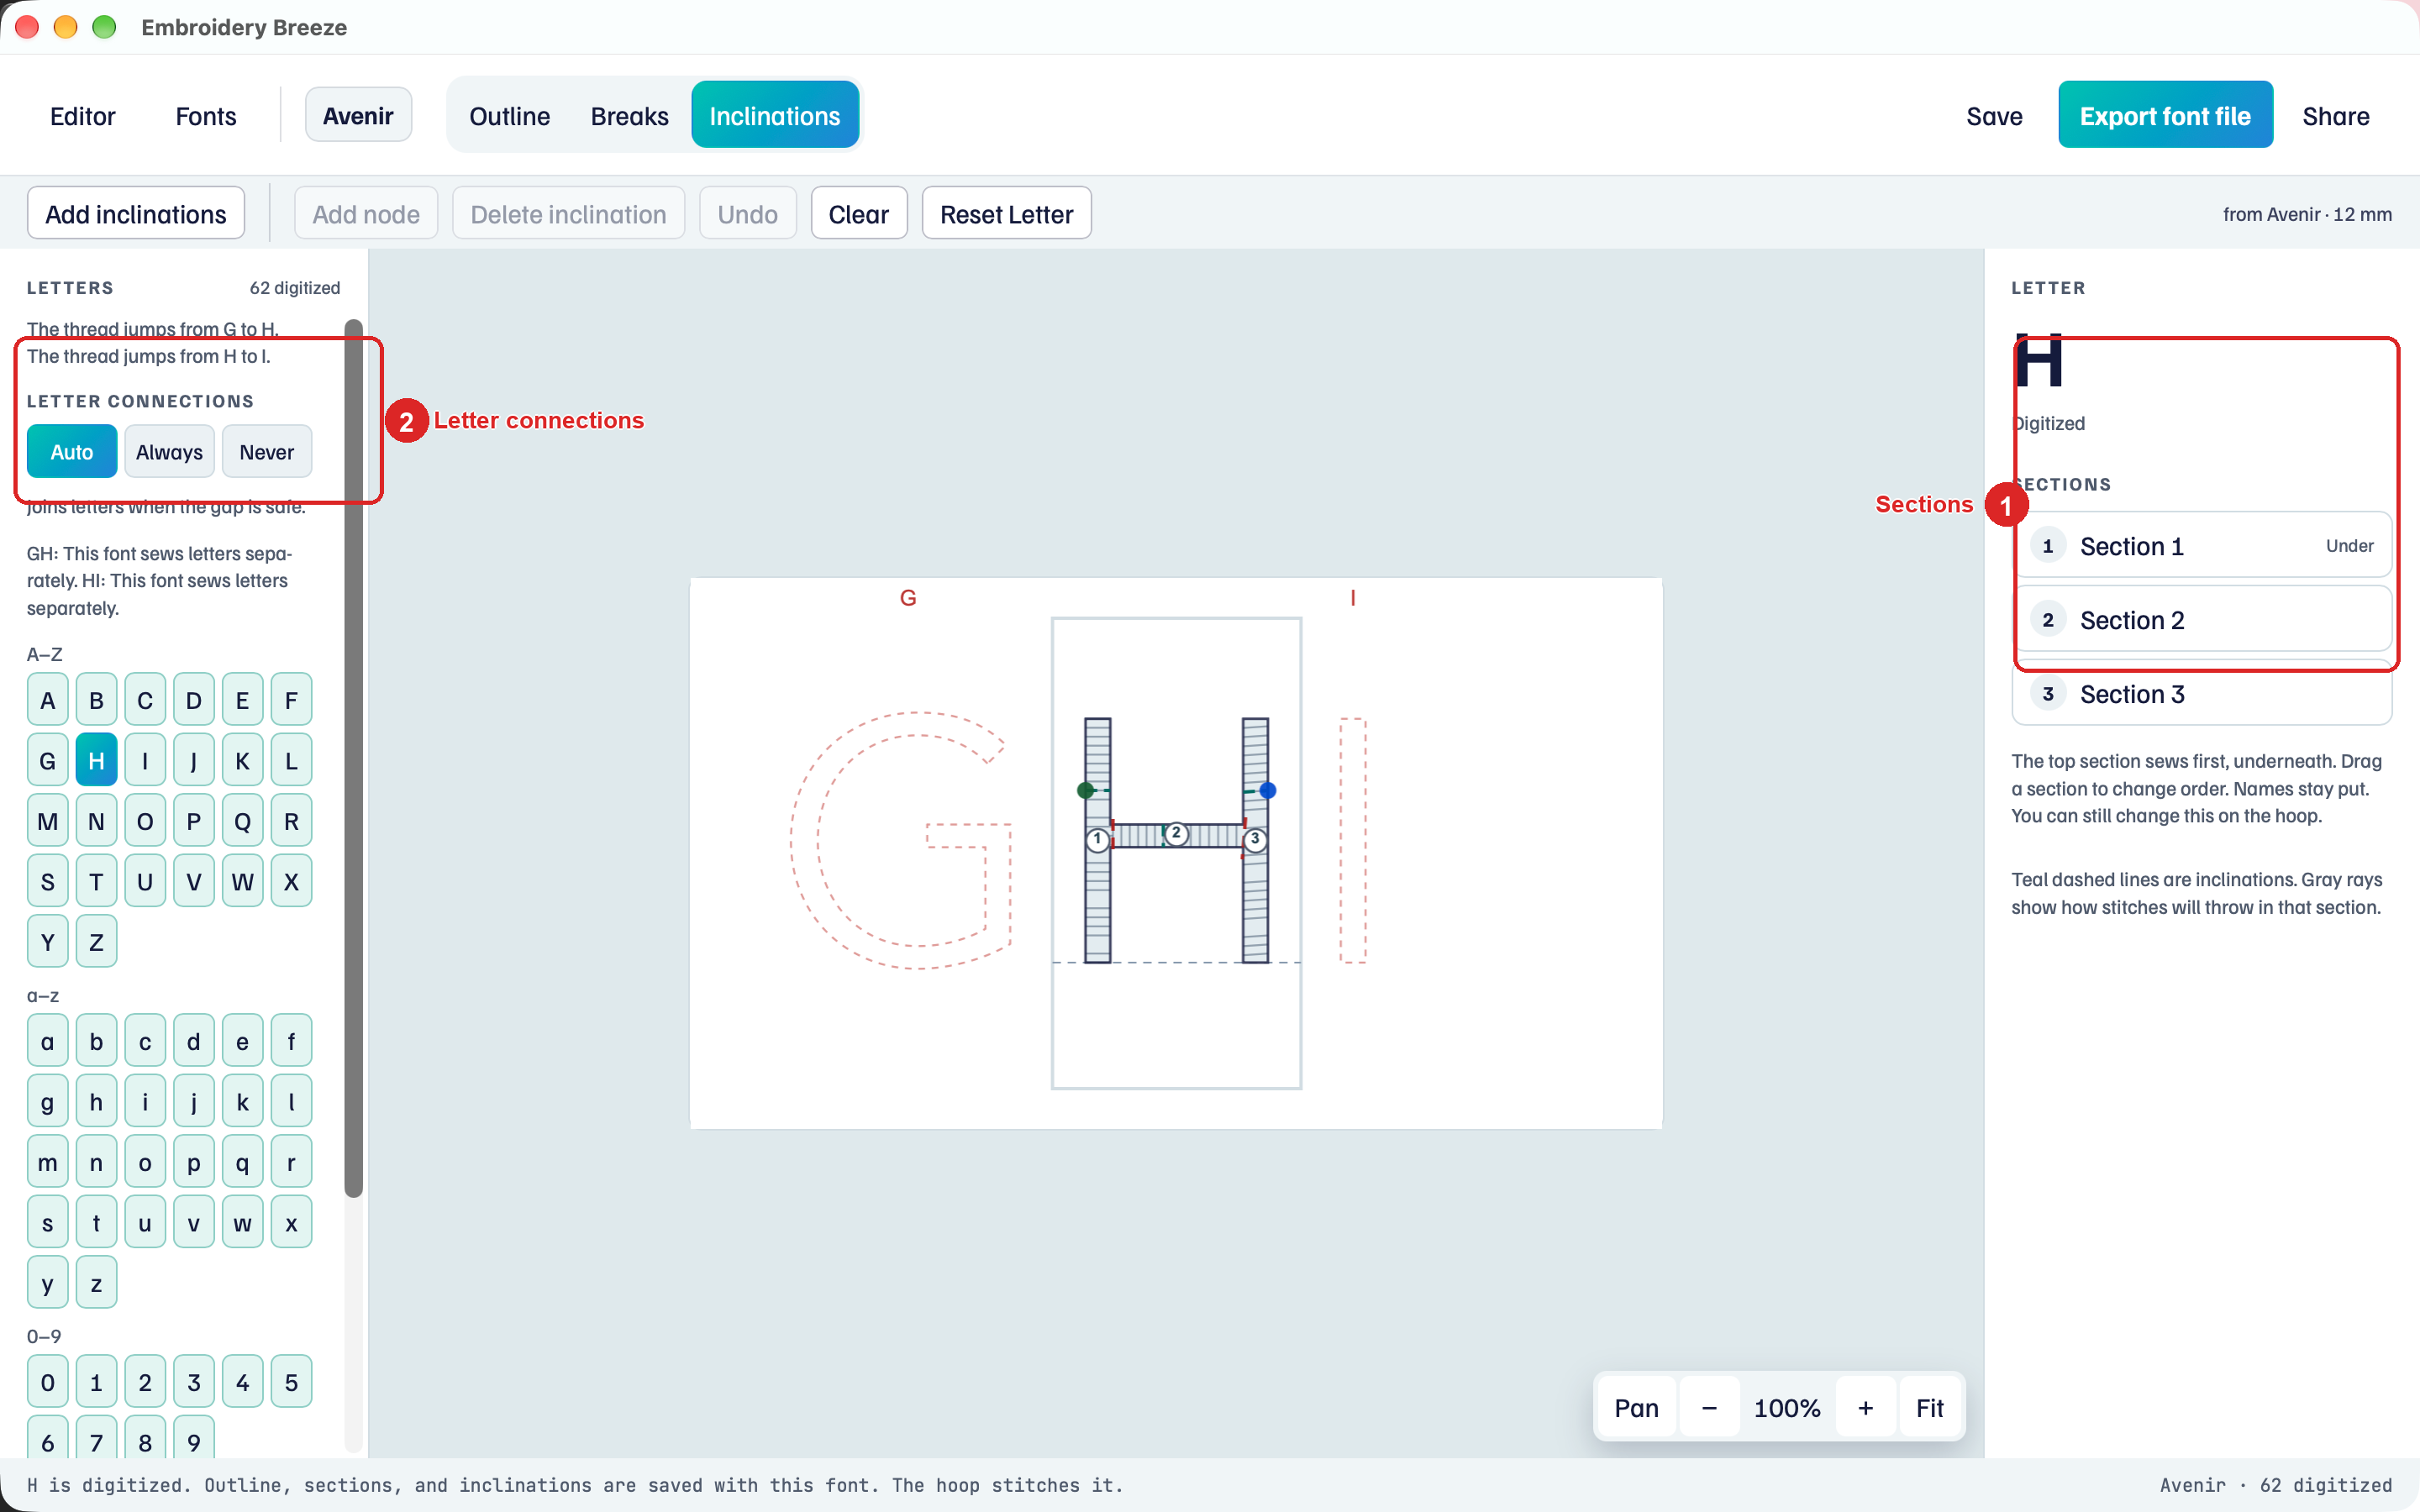
- Tap a row to select that section.
- Under / Over change stacking.
- Reverse flips the sew direction of that section.
Reset Letter clears this glyph without deleting the font.
Letter connections for the whole font: Auto, Always, or Never. Auto joins letters when the gap is safe. Always keeps the needle down unless it would sew through a hole. Never cuts the thread between letters.
Type with it
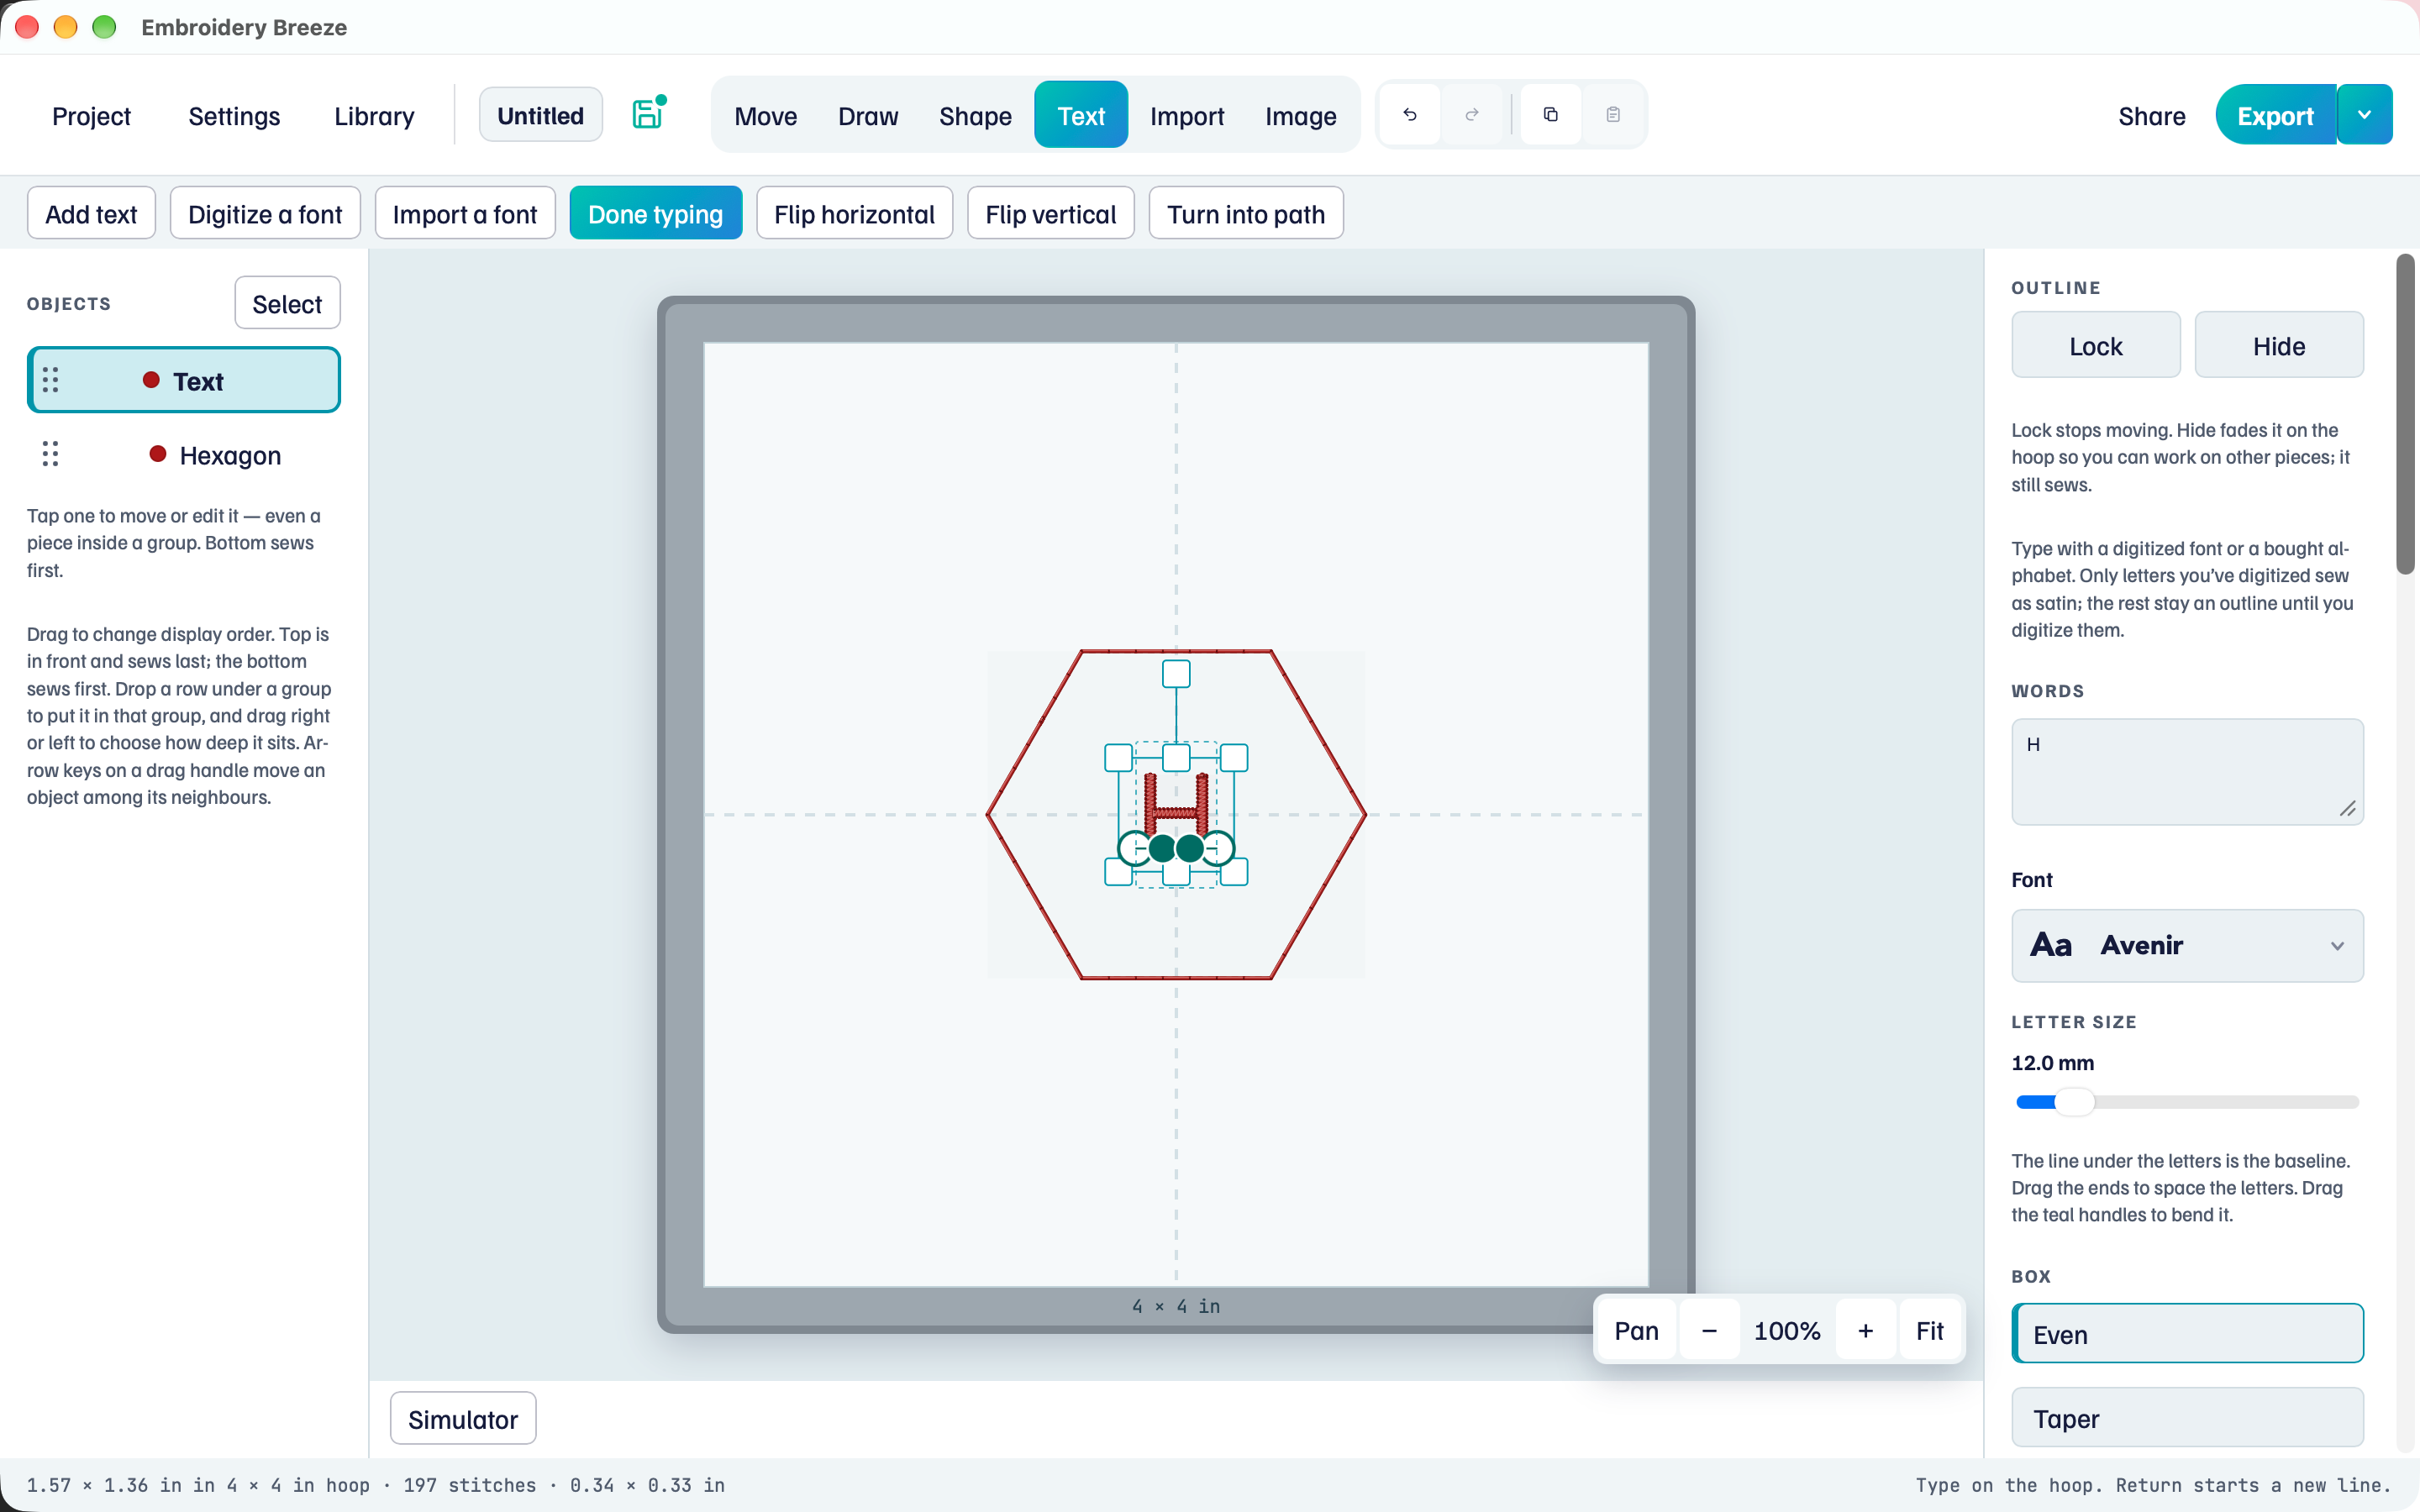
- Click Save.
- Click Editor.
- Text → Add text. Pick the new font. Type Hi.
Missing letters on the hoop: Digitize it jumps back here. Bought alphabets stay in Bought letter alphabets. Never open a bought glyph in this editor.